
Tech is evolving very fast, and innovations are happening in connectivity ports as well.
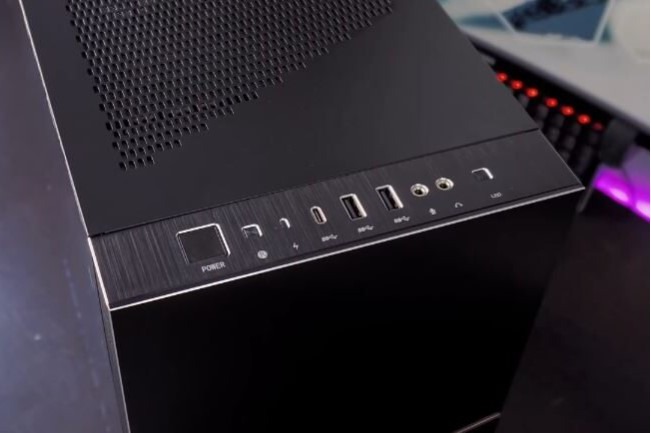
Almost all the tech gadgets, including the latest iPhones on the market, come bundled with a Type-C port for easy accessibility.
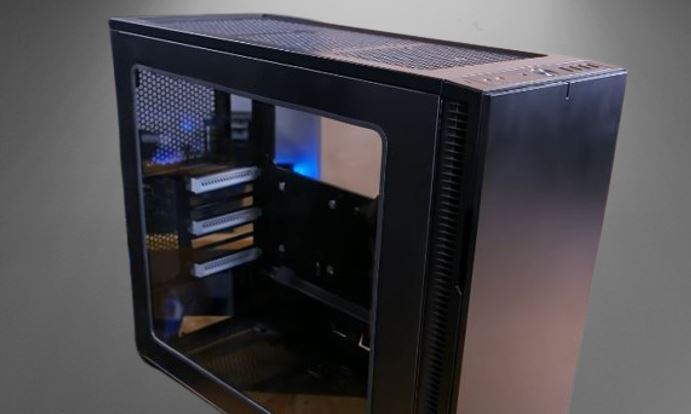
Sadly, the old PC cases, budget cases, and budget motherboards usually do not have a built-in Type C port, making it difficult to connect multiple gadgets directly to your PC.
Now, you might say, I will just get a PCIE adapter that supports type C and connect it to my motherboard, or maybe I can get a new motherboard with an inbuilt type C port.
I agree with you; you can do it.
However, it’s a good opportunity to showcase your DIY skills and make the port yourself on the front panel for ease of use.
I have myself dug a hole in the front panel of my PC case and enjoying the reliability offered by the type C port.
I will share my experience as well as the difficulties that you may encounter in the process.
You don’t need to be a PC expert to do it; anyone can do it with some basic skills.
In this blog, we will learn how to add a USB-C port to a PC case front panel very easily in a few steps.
So, let’s dive in.
Why should you add a USB-C port to your front panel?

You might be wondering, Why shall I mess with my PC case and add a USB-C port?
Well, the answer is that it depends on your personal preferences and convenience.
There are a lot of benefits that the type C port offers, such as:
- The USB C port offers a much faster data transfer speed compared to your old USB 2.0 ports.
- It provides the convenience of using it on multiple devices.
- The USB C port also charges your phone while you are working; this reduces your cable mess and keeps your setup neat.
There are a few drawbacks as well, which are important to understand:
- You may lose your PC case warranty.
- If you are not confident in your DIY skills, please don’t take a risk, as it may damage your PC case.
Is your PC compatible with the type-C port?
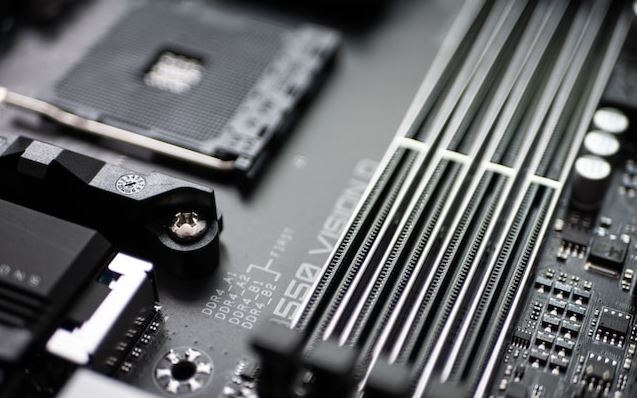
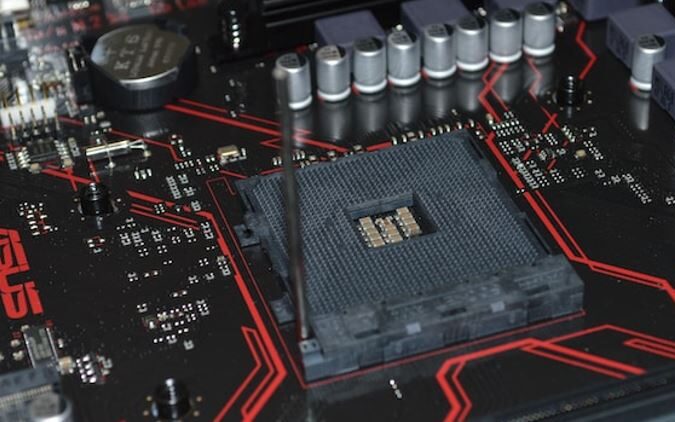
Before getting ready to mod your PC case, check if your motherboard has an empty USB 3.0 or 3.1 slot.
You can check your motherboard manual or directly check the board to see if a USB term is written somewhere on it.
Also, take a look inside your case and check if there is enough space for the port to avoid any messy cable situations.
Some cases have pre-drilled holes or even built-in ports, saving you the DIY drama.
Tools and Safety Precaution

It’s time to gather the simple yet important tools for the process:
- An electric drill depends on whether your PC case front panel is made of plastic or metal.
- A pen and a ruler
- A cutter and a file
- Gloves and safety glasses: We want to be safe from metal splinters and dust to protect your eyes.
How to remove the front panel of your PC case?
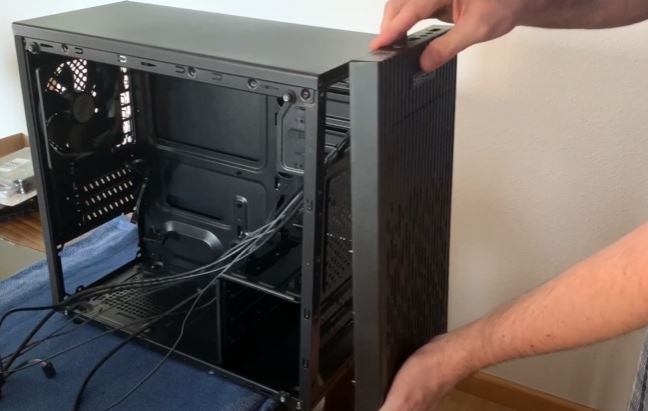
You can easily remove the front panel of your PC case by following the steps mentioned below:
- Identify screws: Check your manual or online for the screws holding the front panel. They may be hidden behind logos or buttons on the top or bottom.
- Unscrew Carefully: Use the screwdriver and take it slow. Don’t force anything to avoid damaging your case.
- Disconnect Cables: After removing screws, don’t forget to unplug connectors and detach buttons. You may also consider labeling cables for easy reconnection.
Choose a location for the new port
It’s time to choose the right location for making the hole and installing the port.
Here are a few things that you can consider:
- Functionality and Style: Find a balance between where you use USB devices and what looks good. Consider a low spot for external drives or a higher one for convenient phone charging.
- Tidy Wires: Choose a location that allows easy cable management to avoid a messy setup, especially if you connect bulky drives.
- Accessibility: Select a spot within arm’s reach for effortless use, avoiding the need for big stretches.
- Plan your layout: Finalize your choice by sketching on paper or using templates. Measure twice before any drilling.
- Mark Your Spot: Mark the center point of your chosen location for precise drilling.
DIY Guide for Adding a USB-C Port to the Front Panel
Let’s discuss the steps involved in the port’s installation process.
Step 1: Apply masking tape
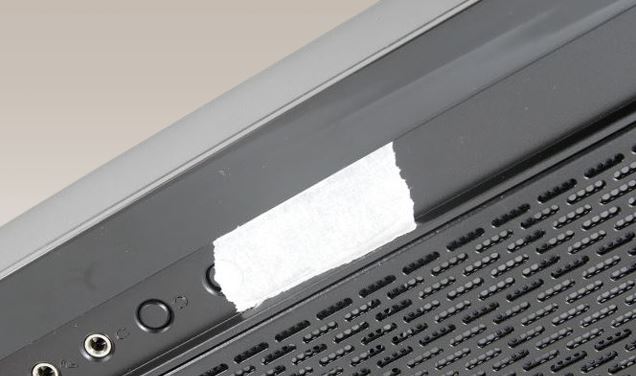
It’s important to apply masking tape to the section where you are going to drill holes. The masking tape protects the paint from damage while you are drilling and filing your PC case.
You can also mark and draw sections using a pencil.
Step 2: Draw the sections
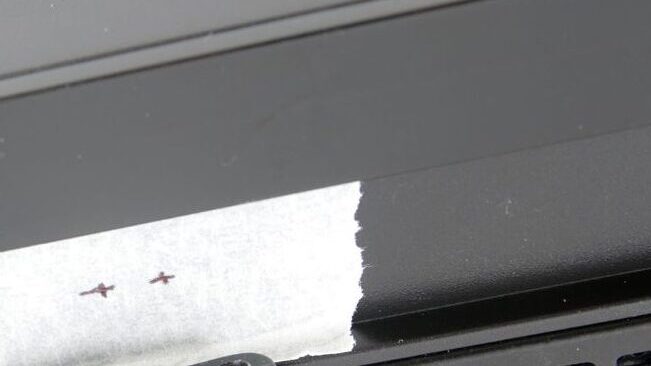
Measure the length of the type C port and mark the section very carefully on which you are going to drill.
It is important to be very precise here, as a simple mistake could create a larger or inaccurate hole.
Step 3: Drill holes
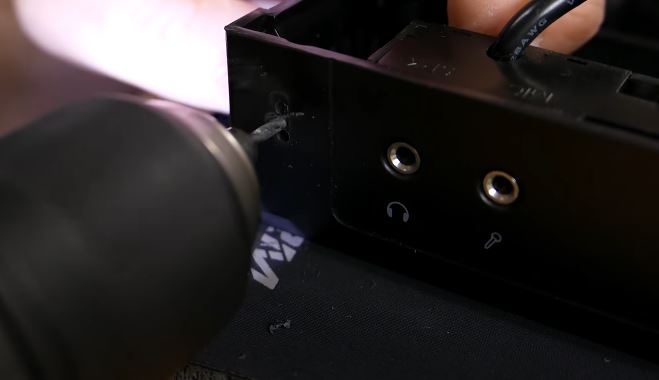
Now, you can start drilling holes in the section you marked. Take it slow and don’t rush, as it requires patience.
You can use a 3 mm drill, which is sufficient to make a hole.
Make sure to carefully use the drill and make a cut in the shape of a type C port.
The difficult task is finally over now.
Step 4: Filing/Cutting the edges

You can start cutting and filing the edges to make the hole perfect. Make sure not to force it, and do it very lightly to avoid damaging your case.
Step 5: Installing the new port
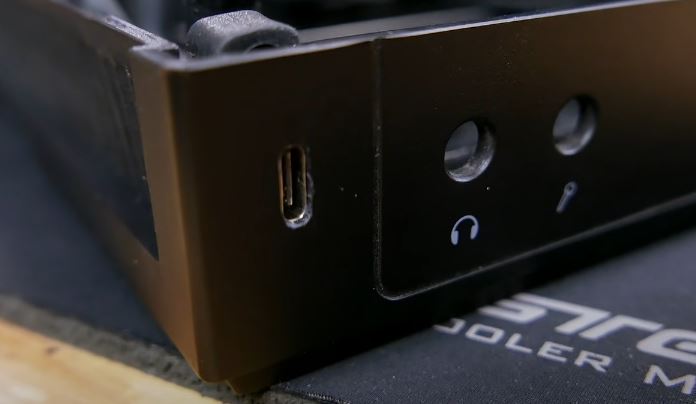
It’s time to install the new port inside the hole you drilled. Usually, the type C connector has a screw with it, but for using screws, you have two drill holes on the left and right sides.
You can follow the same process as above to drill holes if required.
You can also use strong adhesive glue to fix the connector, but in this case, you need to wait 24 hours till it gets dried.
Make sure to clean your front panel to remove the dust and case pieces created during the drilling process.
Step 6: Connecting the circuitry
Now that your USB-C port is in place on the front panel, let’s get it working.
Follow these easy steps to connect it to the motherboard.
- Find the Right Slot: Look for a USB 3.0 or 3.1 slot on your motherboard.
- Match the Ports: Ensure to connect the port to the correct header on your motherboard.
- Plug It In: Use the cable that comes with your USB-C port to connect it to the motherboard. It’s reversible, so there’s no need to worry about the direction.
- Secure Connection: Gently push the connector into the header until it’s set in; don’t try to force it.
- Power Up: Turn on your PC and check the device manager to see if the USB-C port is listed.
Step 7: Reassembly
If everything is ok and your Type C port is working fine, reassemble all your PC components, do some cleaning, and put everything back in your setup so you can enjoy your Type C port.
Conclusion
Finally, after a lot of hard work, you have managed to add a USB-C port to your PC case front panel successfully.
Now, you can enjoy the perks offered by the USB type C port, such as mobile charging, fast data transfers, and much more.
The process is really simple; however, it still takes a little bit of planning to avoid any mistakes.
I hope this blog post has helped you a lot and that you have learned some DIY skills from it.
Please do share your valuable feedback regarding this post in the comment section and your personal experience doing modifications to your PC case.
Thank you for your time. Enjoy your new port!!
Frequently Asked Questions
Do I need special tools to add a USB-C port?
Nope! Basic tools like a drill, file, and masking tape are all you need. Even a rotary tool is optional.
What if I mess up while drilling?
Don’t panic! Minor mistakes can be fixed with filing and re-positioning. For bigger errors, consider pre-drilled cases or external adapters.
Will adding a port void my PC warranty?
Maybe. Check your warranty terms or contact the manufacturer. A safer option might be using a PCIe adapter or motherboard upgrade.
Can I use any USB-C port for the front panel?
Choose a specific front panel header compatible port for seamless integration and avoid adapter hassle. Check your motherboard manual for details.
Do I need to rewire anything after installing the port?
Nope! Just connect the included cable to the corresponding USB header on your motherboard. It’s plug-and-play!
Will my old USB devices work with the new port?
Yes! While designed for faster devices, the USB-C port provides backward compatibility with older USB standards.
Can I add multiple USB-C ports to my front panel?
Absolutely! Some cases feature space for multiple ports, and you can even adapt existing USB slots into Type-C using conversion kits.
Also Read….
- How to Install an LCD Screen in Your PC Case [Step by Step]
- 7 Best Gaming Cabinet Under 4000 in India [2024]
- How to Fix PC Case Fans Not Spinning: 9+ Easy Steps
- How to Paint Your PC Case Like a Pro [Step by Step]
- How to Clean a Gaming PC Case Like a Pro [Step by Step]
- Best Fan Configuration for Gaming PC Case [2023]
- How to Make a Gaming PC Case More Silent: 9 Proven Tips
- How to Manage Cables in a Gaming PC Case: The Ultimate Guide
- How to Choose the Best PC Case for Your Needs: The Ultimate Guide [2023]
Hi, I’m Vishal, founder of Gaming Bar, your ultimate hub for gaming and tech gear. I am passionate and dedicated to improving your gaming experience and providing honest reviews about gaming and tech products. You’ll find plenty of honest, unbiased reviews, buying guides, and expert opinions presented in an engaging manner. All I ask is that you share my blog posts and support me.