
Welcome! PC enthusiasts!!
Have you ever thought of making your PC look more cool while staying within your budget?
If yes, you’ve come to the right place.
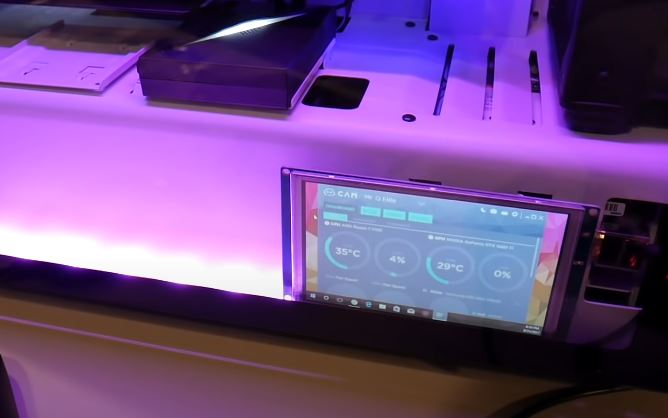
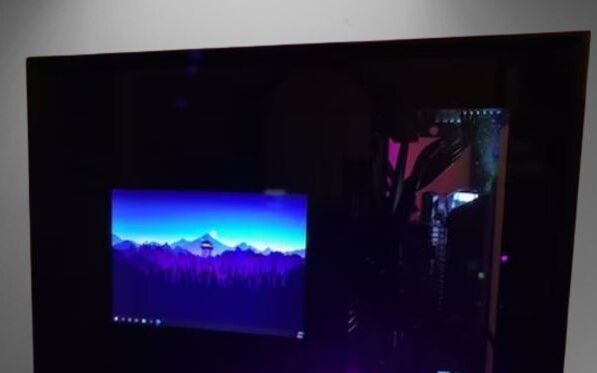
You can use the extra LCD display for aesthetics and show off a really eye-catching and animated wallpaper that fits your PC’s theme.
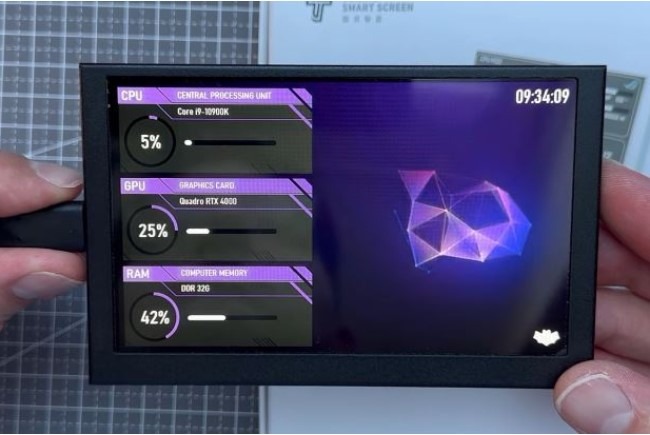
You can also set up a sensor panel to display hardware information, put your best picture on it, and much more.
The LCD screen comes at a very cheap price but enhances the look a lot, which you’ll appreciate.
I myself did this for my PC, and it looks stunning. The process was very easy and smooth, and it took me hardly an hour to do the complete setup.
In this blog, you will learn how to install an LCD screen in your PC case easily to make it look futuristic and satisfying.
So, let’s dive in.
Where do you want to install your LCD display?
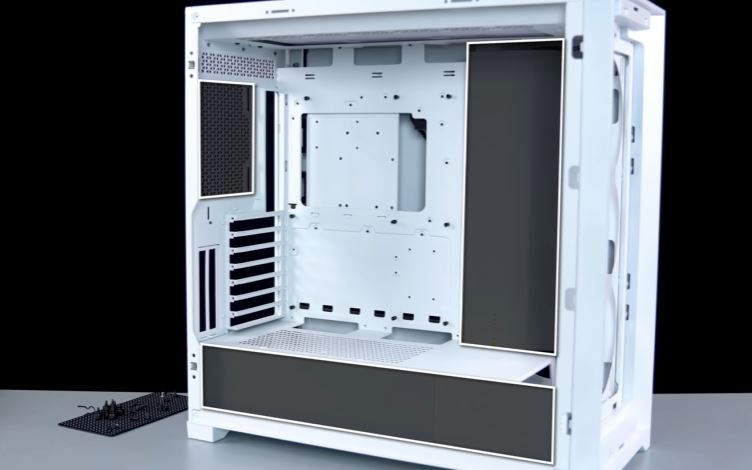
The first thing that comes to mind before setting up your second display is, “Where shall I set it up?”
Well, you can do it anywhere inside your PC case; however, please ensure that it looks great and is clearly visible wherever you decide to do it.
I have set it up beside my motherboard, where it looks good.
You can do the setup on the backside, on your PSU, or anywhere, but make sure it is not getting obstructed by your other components, and you can easily hide the display cables.
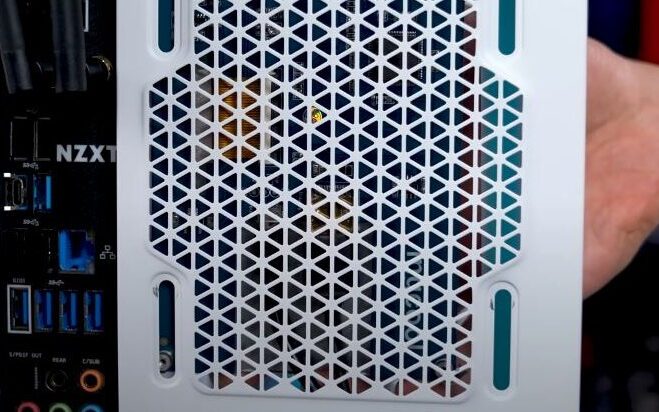
The backside is the most common location, as it is easy to install there due to the sufficient number of cutouts. However, if you are planning to go with this configuration, you have to give up on your backside fan slot.
At the other locations, it may require some modding unless you decide to use double-sided tape to fix the display.
How to buy the right LCD display for your PC Case?
It is important to buy the correct display so you don’t face any issues later.
Let’s discuss the things you need to keep in mind while getting the display:
- Choose the correct size: Make sure to choose the correctly sized display as per your preferences and the available space in your PC case where you are planning to set it up.
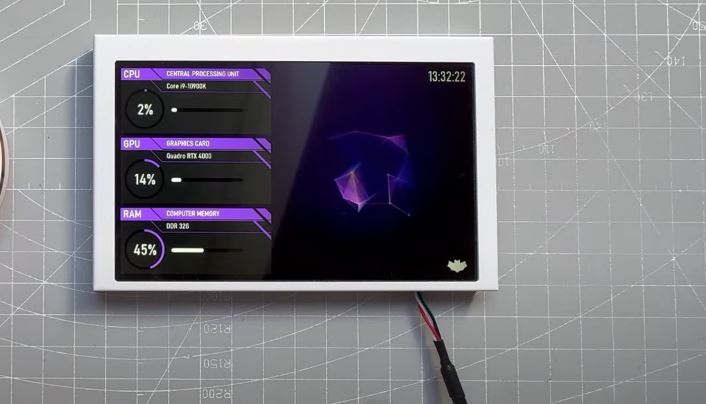
I am using a 7-inch LCD display for my PC, which is enough as per my requirements. - Specifications of the display: The display comes in various resolutions; ensure to pick the right one so the display shows the images and videos clearly without any pixelation.
You can go for an IPS display or any high-quality TFT display as per your budget. Ensure that that display supports HDMI and has a micro USB port. - Budget: It is not necessary to spend a lot on the display as it is your secondary display; any good-quality budget display works just fine.
Preparation
We are now ready to install our LCD monitor, but before that, we need to follow the steps mentioned to prepare our setup:
Step 1: Get the right standoff screws

To install the LCD monitor, you will require four extended standoff screws that go into the threads behind the monitor.
The length of these screws depends on how much you want the monitor to extend out from the back of the case.
In my experience, the normal-size standoff screws that you usually get end up being too short behind the monitor.
You will see an HDMI and a Micro USB port that kind of stick out, so you want to make sure that there is plenty of space between the monitor and the case so that these ports don’t come into direct contact with anything.
Make sure to get a long standoff with its compact screw to ensure that it secures your LCD monitor to your case perfectly.
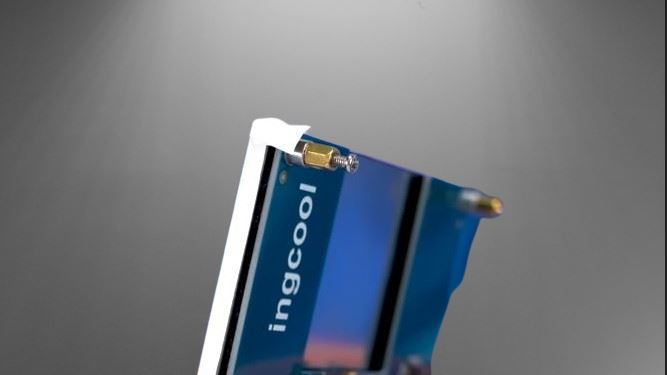
Basically, you need to install four of the standoffs into four of the threads, as shown above.
Step 2: Apply the white/black vinyl to hide bezels (optional)

This is an optional step. If you are using a white or black-themed PC and your bezels aren’t looking good, you can hide them using the white or black vinyl and give them a cleaner look.
Step 3: Check power switch
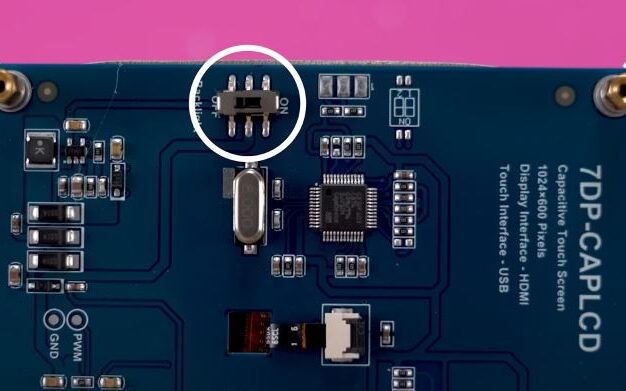
Few LCD monitors have an inbuilt power switch in the back, which is usually set to off by default. Ensure to turn it on before the installation process.
How to install the LCD screen to the backside of your PC case?
Let’s discuss the steps involved in fixing the display to the backside of your case:
Step 1: Position your monitor
Position your monitor properly in place so that the standoffs are visible. It’s totally fine if all four standoffs are not visible, as it depends on which PC case you are using and how the cutouts are designed in it.
Even if you can secure two standouts, that’s totally fine, as your display is quite lightweight. If you are securing two standouts, try to do it diagonally.
Step 2: Tighten all the screws
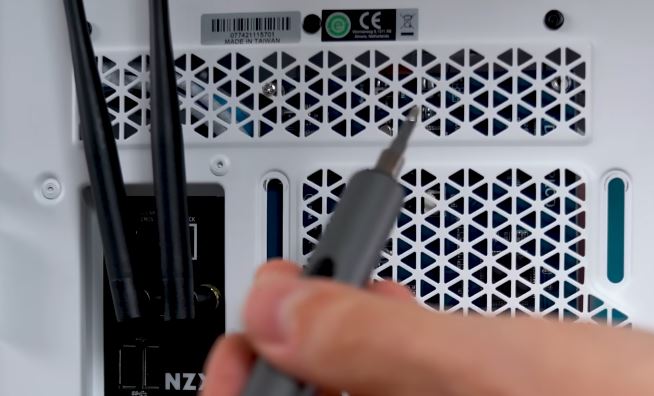
Ensure to tighten all the screws firmly in place. Make sure that the display is intact and attached to your case. Make sure to plug in the HDMI and micro USB cables before enjoying the view.
How to install the LCD screen to the front of PSU Shroud?
The PSU cutout is a very good location to mount your LCD display. Let’s discuss how you can do it easily:
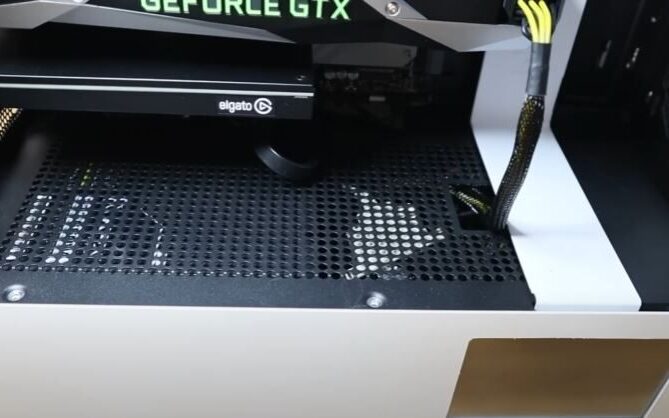
If your case comes with a PSU cutout already, it’s easy to find the correctly sized display and do the setup.
However, if your PC case doesn’t come with a PSU cutout or the cutout size is not sufficient, I would suggest you select any other location to set it up; otherwise, you will have to go through the case modding process and do some hard work to make the cutout first.
Let’s talk about the steps involved in the setup process:
Step 1: Take measurements
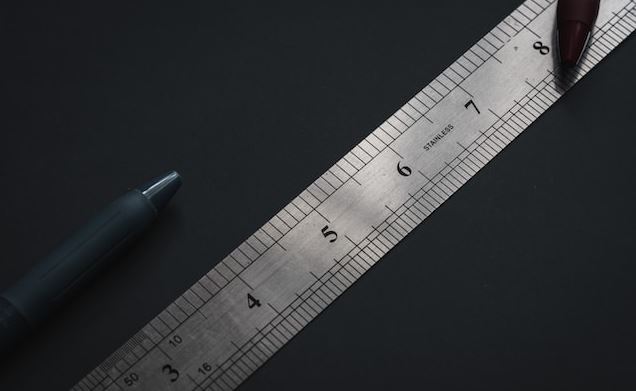
Measure the length of your PSU cutout and measure your LCD screen as well.
If the dimensions of your PSU cutout are perfect and your LCD screen is filling the cutout space, you can directly attach your LCD screen to your PSU cutout using the mounting tape.
If there is any fitting issue, you may need to cut the required space using the cutting tools. I would highly recommend you watch this video to do it.

Step 2: Mount the screen
Use mounting tape to fix the screen inside your PSU cutout, and plug in the HDMI and micro USB cables to enjoy the beautiful scenes.
How to install the LCD screen to the side panel of PC case?
The LCD screen looks really good when mounted to the tempered glass in the side panel of your PC Case.
Lets discuss the steps involved in doing it:
Step 1: Make the frame
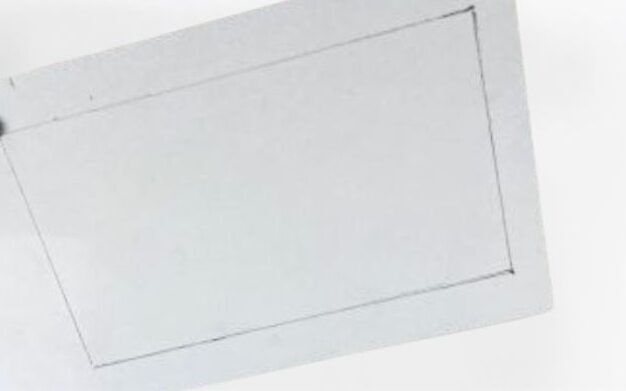
You can use any white or black hard cardboard, depending on your case color. Use the same color frame as your case, and cut out the inside of the frame to fit your LCD screen accordingly.
Step 2: Stick the LCD screen
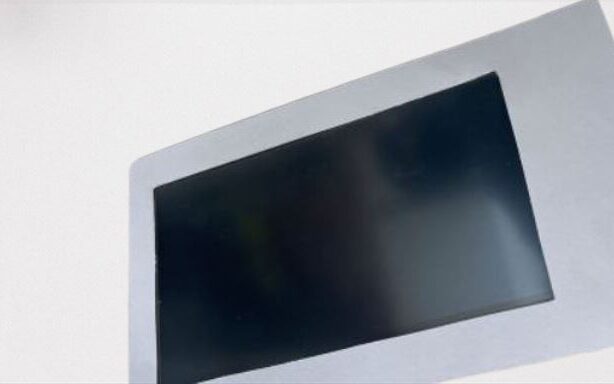
Stick the LCD screen to the frame carefully, which was cut by you, and make sure that the LCD screen bezels cover the frame completely.
Step 3: Mount the LCD screen
Mount the LCD screen to your side panel carefully using a mounting double-sided tape, plug in the HDMI and micro USB cables, and enjoy the pleasant view.
How to setup your LCD screen?
Congratulations!! You are done with the successful mounting of the LCD screen to your PC case. Let’s discuss the setup process, which is very simple.
The process for setting up your LCD screen is the same as for any regular dual-monitor setup.
Here are a few simple steps to do it:
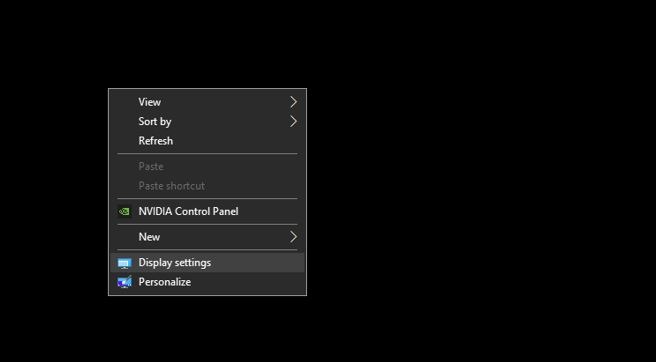
Step 1: Right-click on the desktop and open the display settings.
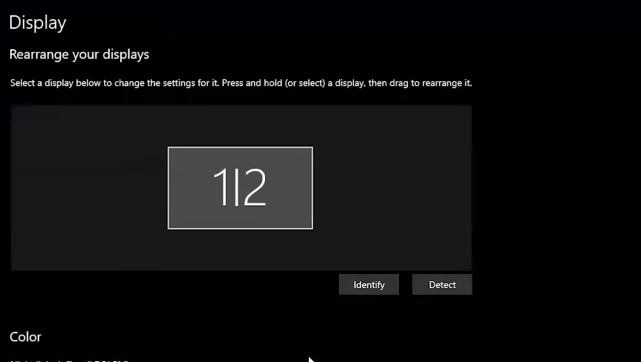
Step 2: You should be able to see the extra display that we plugged in; if not, check the HDMI and Micro USB connections properly. Also, ensure to turn on the power switch on the LCD monitor; usually, it is turned off by default.
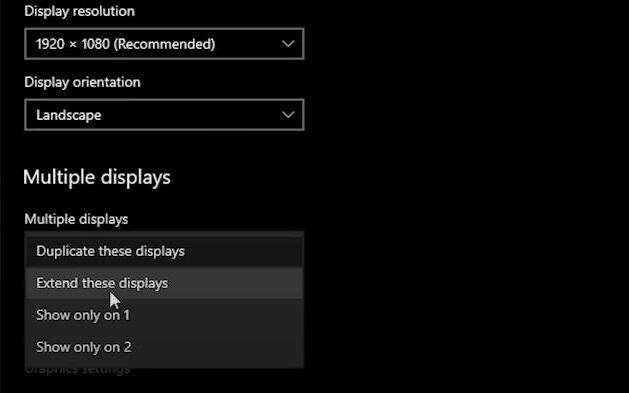
Step 3: Scroll down to the bottom and click on the “extend these displays” option.
Step 4: Scroll up and make sure to select your secondary LCD monitor.
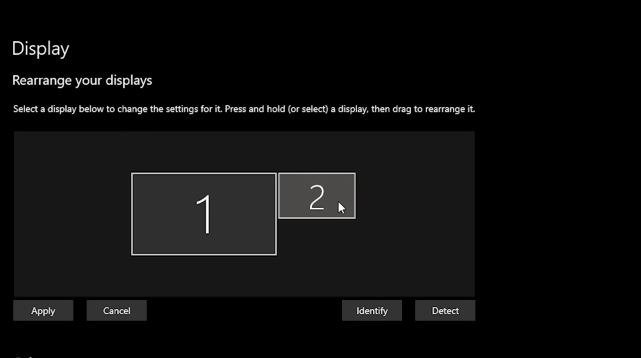
Step 5: Scroll down and ensure that you set the correct orientation.

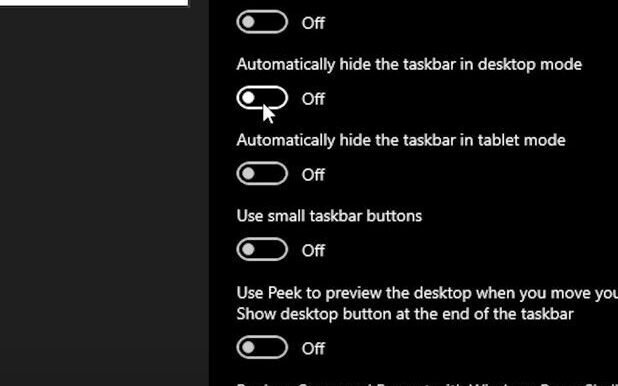
Step 6: Check the “Automatically hide the taskber in desktop mode” option in settings.
How to customize your LCD screen?
Once you are done with the setup of your LCD screen, you can customize it as per your preferences.
You can choose any static wallpaper, animated wallpaper, or display your hardware information, which looks cool.
You can use free software like AIDA64 and create custom sensor panels as well. Here are the steps to do it:
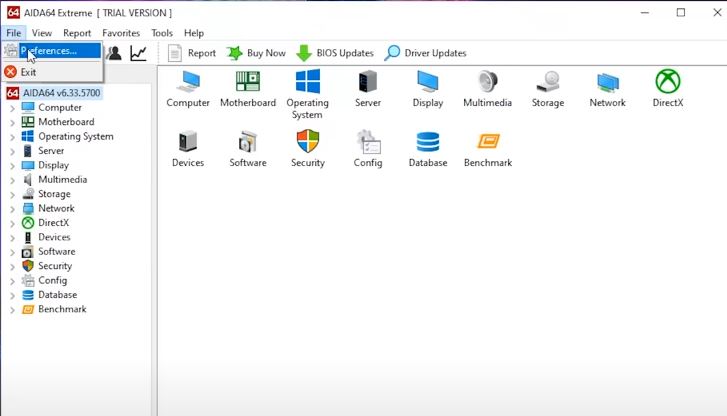
Step 1: Download the software using this link: https://www.aida64.com/downloads
Step 2: Once the software is installed, open it and click on File > preferences
Step 3: Tap on Show Sensor Panel, hit “Apply, “and then “OK.”.
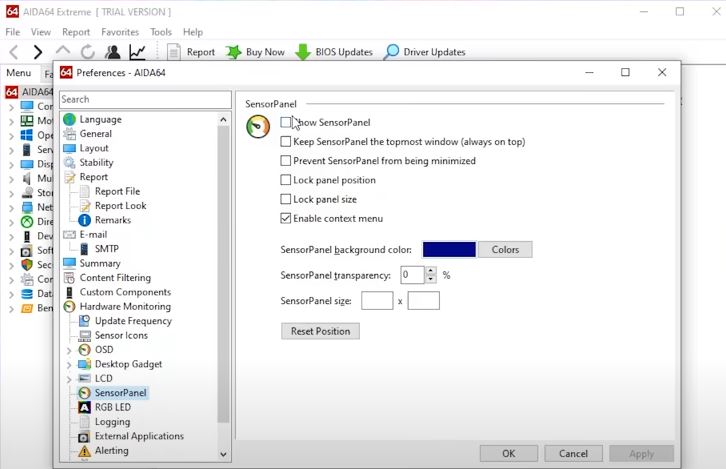
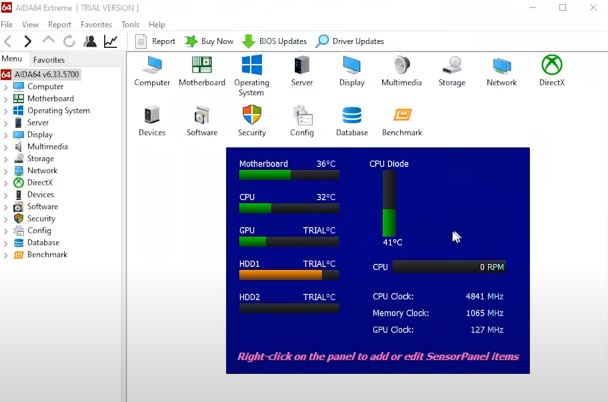
Step 4: You will be greeted with an ugly and weird-looking basic sensor panel, but the good news is that you can create your own unique sensor panel or go to the AIDA forums to see a few very interesting sensor panels out there.
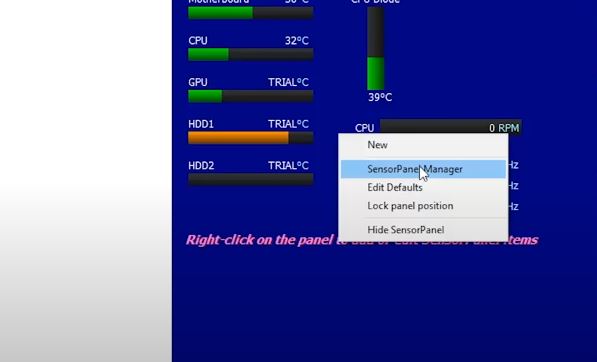
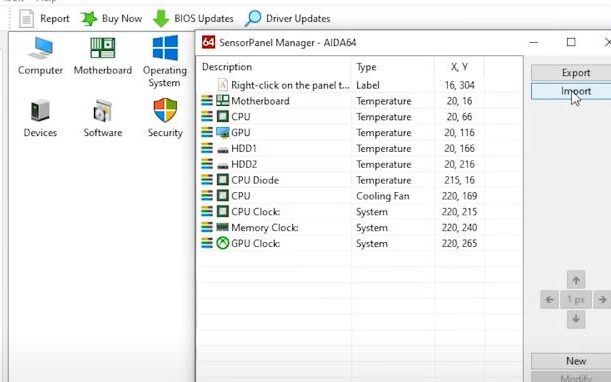
Step 5: If you like any sensor panel in the community forum, you can download it, and then click on this sensor panel to import the custom sensor panel that you have downloaded.
Step 6: Ensure that the resolution of the sensor panel matches the resolution of your LCD monitor to avoid any visual issues.
Conclusion
I hope you enjoyed this tutorial and learned how to install an LCD screen in your PC case.
It’s time to admire your work and explore the different things you can do with this screen.
If you are an anime fan, you can use the specific character video wallpapers to make your screen look amazing and futuristic.
It’s time to showcase your creativity and make your extra money worth it.
If you have any suggestions or feedback, please let me know in the comments section, as it will help me to improve my article further and make it more helpful for other PC enthusiasts as well.
Thank you for reading!!
FAQs (Frequently Asked Questions)
What type of LCD screen should I use?
Choose a small LCD panel (5-7 inches) with an HDMI or USB connection for easy PC integration. Consider touchscreen panels for added control.
Do I need to modify my PC case?
Most likely, yes. You’ll need to cut a hole in the side panel or another location for the screen. Plan the position to ensure cable access and avoid internal components. Measure twice, cut once!
How do I power the LCD screen?
Many options exist: USB power, repurposing the monitor’s adapter, or tapping into the PC’s power supply with specialized kits. Research your chosen screen’s power requirements and choose the safest, most compatible method.
What software do I need to display content on the LCD screen?
Software depends on your desired functionality. Use dedicated applications for system monitoring, custom wallpapers, or media playback. Explore options like Rainmeter, Aida64, or custom coding for advanced displays.
Are there any safety precautions I should take?
Always unplug your PC before working on the hardware. Wear safety glasses when cutting metal or using adhesives. Be careful with fragile components and avoid touching sensitive circuitry.
Can I install a larger LCD screen in my case?
Technically, yes, but larger screens require significant case modifications and advanced power solutions. Start small and gain experience before tackling ambitious projects.
Also Read….
- 7 Best Gaming Cabinet Under 4000 in India [2024]
- How To Add a USB-C Port To a PC Case Front Panel [Step by Step]
- How to Fix PC Case Fans Not Spinning: 9+ Easy Steps
- How to Paint Your PC Case Like a Pro [Step by Step]
- How to Clean a Gaming PC Case Like a Pro [Step by Step]
- Best Fan Configuration for Gaming PC Case [2023]
- How to Make a Gaming PC Case More Silent: 9 Proven Tips
- How to Manage Cables in a Gaming PC Case: The Ultimate Guide
- How to Choose the Best PC Case for Your Needs: The Ultimate Guide [2023]
Hi, I’m Vishal, founder of Gaming Bar, your ultimate hub for gaming and tech gear. I am passionate and dedicated to improving your gaming experience and providing honest reviews about gaming and tech products. You’ll find plenty of honest, unbiased reviews, buying guides, and expert opinions presented in an engaging manner. All I ask is that you share my blog posts and support me.