
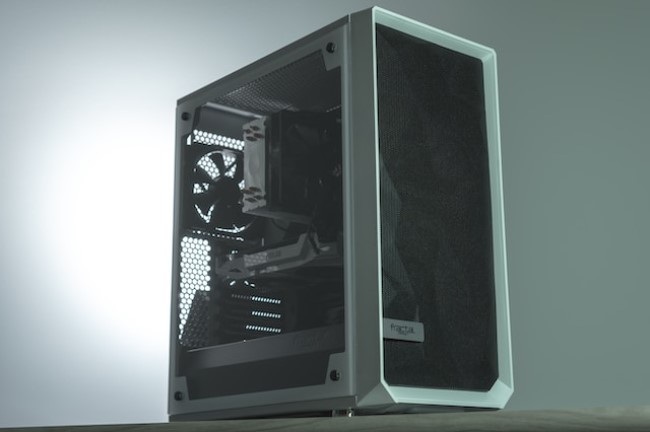
Are you feeling bored with the looks of your PC case? 😩
Your PC case might be very powerful on the inside 💪, but let’s be honest; it looks dull and boring, just like a sheet of paper.
Your computer is not just a machine; it should showcase your personality and interests. That’s where painting your PC case comes in.
Don’t worry; I’m not talking about a messy painting session; I’m talking about making your computer unique and cool.
Imagine flames or your favorite video game character painted on your PC. The possibilities are endless!
Painting your PC case not only improves the looks but also helps to improve airflow, resist dust, or hide scratches.
And the best part? You don’t need to be the world’s best artist to do it. This guide will help you, step by step, on how to paint your PC case like a pro, even if you’re more into video games than painting.
We’ll cover everything, from choosing the right paint to avoiding mistakes.
I’ll share my own PC painting experience and tips to make the process smooth and fun.
This blog post would be definitely helpful for a beginner as well as a seasoned pro who wants to showcase their creativity.
Now, it’s time to say goodbye to the old boring black box and get ready to make your computer look awesome and worth appreciating. Let’s do it!!
So, let’s dive in.
Preparation
It’s time to prepare for the painting process; let’s take the necessary steps to ensure our process is smooth and easy.
Gathering Tools and Materials

Before we start painting our PC case, let’s gather the things we need for this cool project.
- Screw Tools: Get some screwdrivers – Phillips, flathead, and maybe a tiny one for fan screws.
- Smooth Out: Use sandpaper (start with fine grit, like 220) to smooth out bumps and scratches on your case.
- Tape: Use tape to cover up anything you don’t want painted, like windows, logos, or unused ports. Go wild, tape like a maniac!
- Safety Gear: Use drop cloths and gloves to protect against paint splatters. Wear safety glasses to shield your eyes from paint fumes.
Paint and Brushes:
The practical part! Pick your tools:
- Spray Paint: Easy and quick for big areas. Practice on cardboard first.
- Acrylic Paint: Good for detailed designs, stencils, and pixelated characters. Takes longer to dry.
- Special Paints: Check out options like glow-in-the-dark or chrome, ensuring they work with your case material.
Extra Tools for Pros:
- Airbrushing: Precise paint spraying, not for beginners.
- Stencils: Use them for perfect logos or detailed patterns. Tape them down securely to avoid messiness.
Primer Selection:
Don’t overlook the primer – the essential base that enhances your paint colors! Here’s a quick guide to picking the right one:
- Oil-Based Primer: Ideal for highly porous surfaces like wood or concrete. It acts like a super adhesive, ensuring the paint sticks securely.
- Latex Primer: Suitable for smooth surfaces such as drywall or metal.
- Shellac Primer: This special formula works on almost any surface, even shiny ones! It’s like a double-sided tape for paint, ensuring it adheres well to slippery materials.
Always match your primer to your paint and surface material for the best results.
Now, with your tools ready and paints on standby, we’re a step closer to transforming that plain object into a work of art!
Surface Preparation
Let’s prepare our surface and make it ready for the painting process.
Cleaning and Degreasing:
For a good paint job, start with a clean surface:
- Metal Surfaces: Wipe them down with a damp cloth and mild dish soap – gentle suds, no scouring powder!
- Plastic Surfaces: Use a mix of warm water and white vinegar – avoid harsh chemicals to prevent damage.
- Tempered Glass: Treat it like your phone screen – microfiber cloth and glass cleaner, no rough treatment!
Sanding and Smoothing:
Sanding smoothens out bumps and scratches for a flawless finish:
- Fine Grit Sandpaper: Start with fine grit (around 220) for most surfaces – gentle whispers, not sandblasting!
- Metal Cases: If there are scratches, use a slightly coarser grit (around 150) carefully.
- Plastic Cases: Be extra gentle with plastic, use even finer sandpaper (around 320), and go with the grain to avoid scratches.
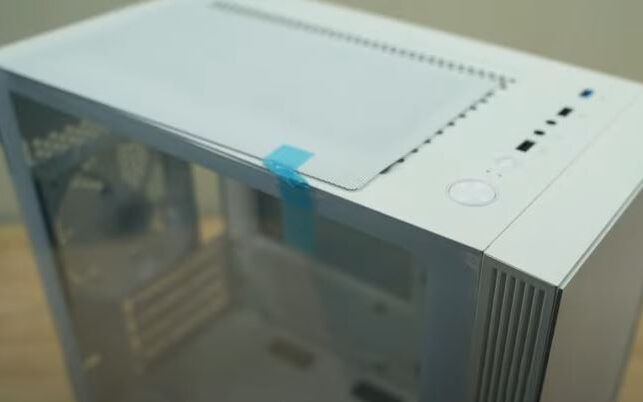
Masking and Protecting:
Dress up your case with masking tape to shield areas you don’t want painted – windows, logos, unused ports. For extra tricky curves or intricate designs, consider using:
- Paper Shields: Cut custom shapes from paper for hard-to-reach spots.
- Aluminum Foil: Use foil to reflect paint away from delicate areas like edges and corners.
Remember to protect internal components – cover fans and LEDs with paper or tape. Let’s ensure they don’t unintentionally become paint victims.
With a clean case and careful masking, your PC is prepped for the next step – the paint application! Onward to the next stage: Color Your World!
It’s time to paint
It’s time to start enjoying our painting process.
Primer Application

Before we start painting, there’s an important step to make sure your paint job lasts: primer.
It’s like a sticky base coat that helps the paint stick well.
Choosing Primer
The kind of primer depends on your paint:
Spray Paint: Use a spray primer that matches your paint color.
Acrylic Paint: Go for a water-based primer.
Specialty Paints: Follow recommendations for unique paints like glow-in-the-dark or chrome.
Applying Primer
Now, apply the primer. Use thin coats – a light spray, not too heavy. It’s better to do two or three thin layers than one thick one. Let each layer dry completely before adding the next – patience is important for a smooth finish.
Don’t forget corners and tricky spots – use a small brush.
This ensures every part is ready for the next step: adding color!
Base Coat and Color Layers
Finally, it’s time to bring out your inner artist! This is where your PC case goes from plain to colorful. Get ready for the world of adding color!
Choose Your Tool
- Spray Paint Users: Use spray paint for quick, even coverage on large areas. Practice on cardboard first, hold the can at least a foot away, and move smoothly for light, even coats.
- Acrylic Painters: Grab brushes for detailed designs. Acrylics work well for custom designs and tiny details. Take your time, use thin coats, and clean your brushes between colors.
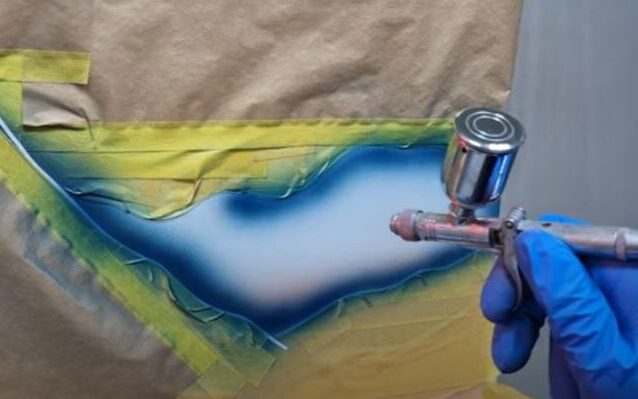
- Airbrushing Enthusiasts: If you’re up for it, airbrushing gives precise control for detailed designs. Practice on scrap material first, invest in ventilation, and remember, slow and steady wins the race.
Painting Tips
No matter your choice, go for thin coats. Gradually build up the color – two or three thin layers are better than one thick one. Let each layer dry completely before adding the next.
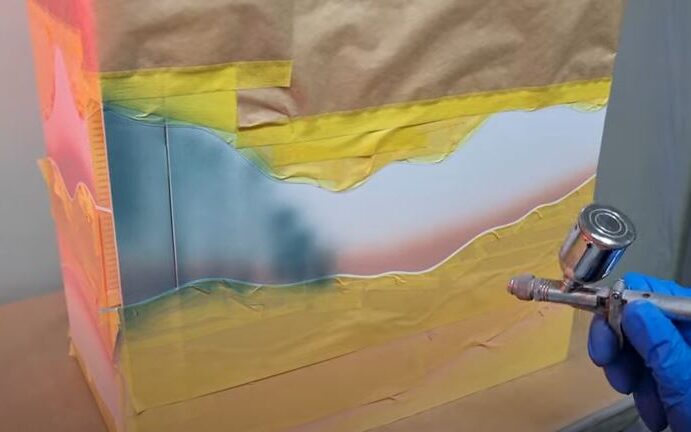
Creative Touches
Want to add some flair to your paint job? Try these tricks:
- Stencils: Perfect for logos or patterns. Tape them down securely, and use less paint to avoid bleed-through.
- Masking Tape: Create clean lines or geometric shapes. Get creative with tape for endless possibilities.
- Gradients: Blend two or more colors for a smooth transition. Start with lighter shades and gradually add darker ones.
With a steady hand, some patience, and a bit of creativity, your PC case will become a canvas of your imagination. Onward to the next step: Sealing the Deal!
Clear Coat and Finishing Touches
We’re almost done, and here’s the last step – applying the clear coat!
Think of it as a protective shield for your painted masterpiece, guarding against scratches, dust, and the occasional coffee spill.
It also adds a nice finishing touch, making your colors look fresh and vibrant.
Choose Your Finish:
Select a clear coat based on your preferred look:
- Gloss Finish: For a shiny, attention-grabbing appearance.
- Satin Finish: Offers a softer sheen, maintaining a sophisticated look.
- Matte Finish: Gives a modern, velvety texture, perfect for minimalist designs.
- Applying Clear Coat: Stick to the mantra of thin coats – apply it like you did with the paint, in light, even layers.
Let each layer dry completely before adding the next. Pay attention to corners and nooks for a uniform finish.
Final Touches:
Before celebrating your masterpiece, consider these finishing touches:
- Touch-Up: If some paint escaped the masking tape, use a small brush for touch-ups.
- Peeling Off Tape: Slowly and carefully peel off the masking tape to avoid accidentally removing paint.
- Admire Your Work: Take a moment to appreciate what you’ve achieved! Your PC has transformed from plain to vibrant, reflecting your creativity.
Now, power it up, enjoy your creation, and bask in the admiration of fellow tech enthusiasts. You’ve turned your PC into a canvas of your imagination.
That’s it! From plain to personalized, this guide has led you through the process of PC case painting.
Remember, the key ingredients are your creativity and the willingness to unleash your inner artist.
So, grab your tools, choose your colors, and bring your tech dreams to life! The world, and your desk, are ready for your masterpiece.
Reassembly and Testing
Now it’s time to put your PC back together.
Reverse the order in which you took it apart, considering it like assembling puzzle pieces with wires and fans.
Double-check all the connections, especially those tricky cables and plugs. When tightening screws, keep it gentle.
Power Up:
Flip the switch and hold your breath. If your PC boots up successfully, you’ve nailed the painting process! Fans running smoothly, lights shining bright – it’s a well-oiled machine. Celebrate your success, you’ve earned it!
Perform Quick Checks:
Run some tests to ensure everything is functioning correctly. Notice anything unusual?
It’s likely just a loose screw or misplaced wire.
Fix it, adjust it, and then take a moment to appreciate your colorful creation.
You’ve turned a dull box into a piece of art, and your fellow tech enthusiasts will be impressed!
Continue Personalizing:
This is just the starting point. Keep customizing your PC, adding your personal touch.
The possibilities are vast, just like your creativity. Move forward and bring your tech dreams to life!
Conclusion
Congratulations!
Your dull-looking box has been reborn, pulsating with your creative touch. From hesitant brushstrokes to the final power-up, it’s now a masterpiece singing your unique tech tune. Share your vibrant creation online, inspire others, and show that paint belongs on PCs too!
Yes, there were hiccups – a stray screw, a stubborn drip – but that’s all part of the adventure. You’re not alone! Keep exploring, keep learning, and keep painting your tech dreams.
Grab your brushes, channel your inner Picasso, and create your personalized masterpiece. Every PC deserves a transformation, an opportunity to reflect your passion. The paintbrushes are calling – answer their vibrant summons!
I hope this blog was enjoyable and you learned something new!!
FAQs (Frequently Asked Questions)
Can I safely paint my PC case?
Yes! With proper preparation and the right paints, you can transform your case into a stunning masterpiece without harming it.
What’s the best paint for a PC case?
It depends! Spray paint is fast and easy for large areas, acrylics let you get detailed with stencils and designs, and specialty paints like chrome offer unique effects. Choose based on your skill level and desired style.
Do I need primer for my PC case?
Definitely! Primer creates a strong bond between the paint and the case, preventing chipping and ensuring smoother coverage. Match the primer to your paint and surface material for optimal results.
Should I sand my PC case before painting?
Yes, a light sanding is recommended. Use fine-grit sandpaper to remove bumps and scratches, creating a smooth canvas for your paint.
Is airbrushing the best way to paint my PC case?
Not necessarily! Airbrushing is great for intricate designs, but spray paint and stencils can achieve amazing results too. Choose the technique that suits your comfort and desired outcome.
Do I need to apply clear coat after painting?
It’s highly recommended! Clear coat protects your paint job from scratches and adds a beautiful shine. Choose matte, gloss, or satin finishes to match your style.
How do I reassemble my PC after painting?
Take it slow and work in reverse! Carefully put components back in the order you removed them, double-check all connections, and avoid overtightening screws.
Also Read….
- How To Add a USB-C Port To a PC Case Front Panel [Step by Step]
- How to Install an LCD Screen in Your PC Case [Step by Step]
- 7 Best Gaming Cabinet Under 4000 in India [2024]
- How to Fix PC Case Fans Not Spinning: 9+ Easy Steps
- How to Clean a Gaming PC Case Like a Pro [Step by Step]
- Best Fan Configuration for Gaming PC Case [2023]
- How to Make a Gaming PC Case More Silent: 9 Proven Tips
- How to Manage Cables in a Gaming PC Case: The Ultimate Guide
- How to Choose the Best PC Case for Your Needs: The Ultimate Guide [2023]
Hi, I’m Vishal, founder of Gaming Bar, your ultimate hub for gaming and tech gear. I am passionate and dedicated to improving your gaming experience and providing honest reviews about gaming and tech products. You’ll find plenty of honest, unbiased reviews, buying guides, and expert opinions presented in an engaging manner. All I ask is that you share my blog posts and support me.