
The laptops available on the market nowadays look stunning and have a sleek design.
However, the size of the laptops is getting smaller, and the majority of the laptops come with a 14-inch or 15.6-inch display.
This makes the laptop very portable, but due to the small screen size of laptops, it is difficult to see the text and work comfortably.
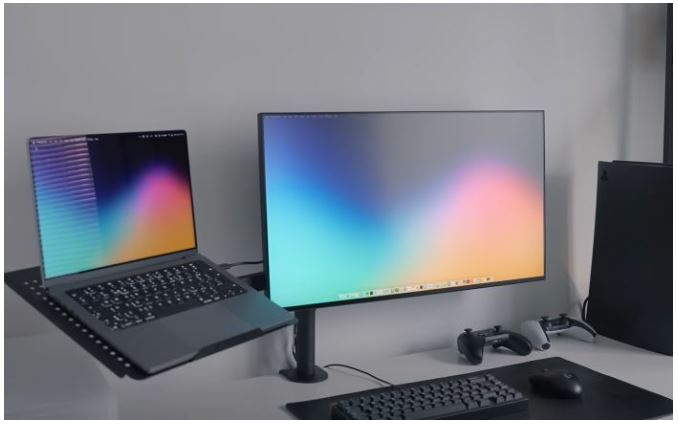
An external monitor makes it easier to work.
However, if your laptop doesn’t have a built-in HDMI port and only has type C ports, the connectivity options become limited.
If your laptop has an HDMI port as well, you can still use the type C ports for a multi-monitor setup.
To connect a monitor to your laptop with USB-C, you can use one of the following methods:
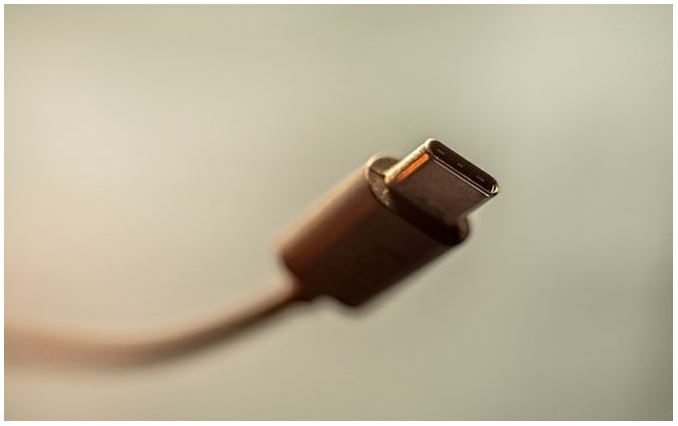
- USB-C to USB-C cable: Connect the USB-C port on your laptop to the USB-C port on the monitor using a USB-C to USB-C cable.
- USB-C to HDMI cable: Connect the USB-C port on your laptop to the HDMI port on the monitor using a USB-C to HDMI cable.
- USB-C to DisplayPort adapter: Connect the USB-C port on your laptop to the DisplayPort port on the monitor using a USB-C to DisplayPort adapter.
The type of cable you need depends on the ports available on your laptop and monitor. If your laptop has limited USB-C ports, you may need to use a USB-C hub to widen your options.
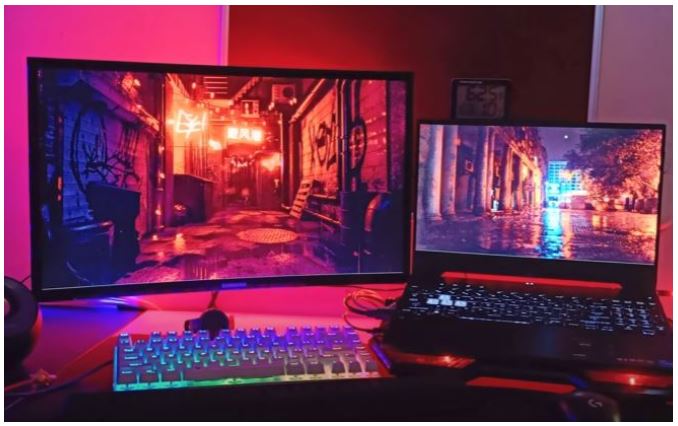
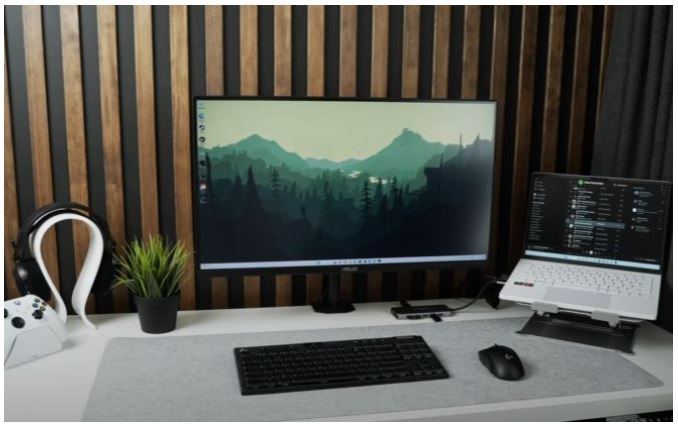
Whether you’re a student, a professional, or just someone who wants to get more done, you can unlock the full potential of your laptop by adding an external screen with this comprehensive guide.
I am myself using my laptop along with my monitor for my desk, and it was easy to set up.
In this blog post, we’ll discuss how to connect a monitor to a laptop with USB-C and do the setup easily, how to choose the correct type C cable, setting up multiple monitors, and much more.
So, let’s dive in.
What are the different types of USB-C ports in laptops?
There are a lot of laptops on the market that come with different types of USB-C ports that offer different features, creating confusion among users.
Please note that not all laptops’ USB-C ports support an external display, especially budget ones.
This makes it even more important to identify the correct port on your laptop.
These are the most common type of ports available in laptops and ways to identify it:
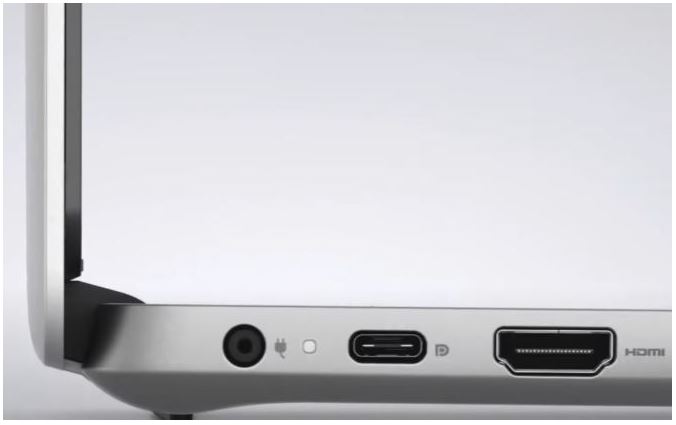
- Full-functioned Type-C port: This port can transfer data, audio, video, and power. It is usually denoted by a unique lightning bolt symbol next to it.
If your laptop has this type of Type-C port, you can easily connect your monitor to your laptop through it and enjoy the big display. You can do much more using this port. - USB 3.2 Gen 1 Type C port: This port is very common and supports data transfer speeds up to 5 Gbps.
Sadly, it doesn’t support display output, so you have to use the HDMI port on the laptop to connect your monitor. - USB 3.2 Gen 2×1 Type C port: This port is used in many laptops and supports data transfer speeds up to 10 Gbps. It also doesn’t support the external display.
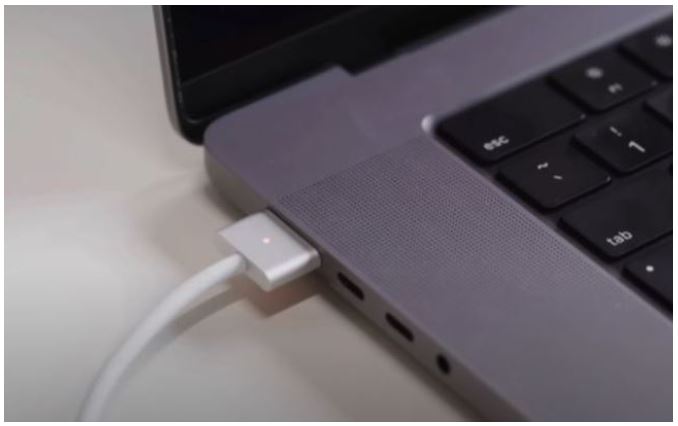
- Thunderbolt 3: This port is usually found in Macbooks and high-end Windows laptops. It supports high-speed data transfer up to 40 GB/s, audio, display, and power delivery.
If you have this port on your laptop, you don’t need to worry about anything; your monitor will show your laptop’s display.
You can check this table for the different type C connectivity options and the features offered by them:
| Type of USB-C Port | Data Transfer | Audio | Video | Power Delivery | Peak Speed |
|---|---|---|---|---|---|
| Full-functioned Type-C port | ✅ | ✅ | ✅ | ✅ | 5 Gbps |
| USB 3.2 Gen 1 port | ✅ | ❌ | ❌ | ✅ | 5 Gbps |
| USB 3.2 Gen 1×2 port | ✅ | ❌ | ❌ | ✅ | 10 Gbps |
| USB 3.2 Gen 2×1 port | ✅ | ❌ | ❌ | ✅ | 10 Gbps |
| USB 3.2 Gen 2×2 port | ✅ | ❌ | ❌ | ✅ | 20 Gbps |
| Thunderbolt 3 port | ✅ | ✅ | ✅ | ✅ | 40 Gbps |
Usually, the laptop manufacturers don’t show any symbol for the type C port, which makes it difficult to identify the type of port used, but you can still get this information easily from the laptop specifications page or check online.
Determine your laptop and monitor’s compatible video output formats (HDMI, DisplayPort)
There are various ways in which your laptop can be connected to your monitor; the most common ones are HDMI, DisplayPort, and USB-C with DisplayPort Alternate Mode.
HDMI is a popular choice for regular use and watching stuff in good quality, whether it’s standard or super clear like 4K.
DisplayPort is faster than HDMI and supports super-high resolutions like 8K, making it great for high-quality displays and professional setups.
However, you will need an adapter if your laptop has a USB-C port and your monitor has a Display Port, unless the USB-C port supports DisplayPort Alt Mode.
Some USB-C ports can act like DisplayPort connectors, which means you might not need extra adapters and you can directly connect your laptop to your monitor’s display port.
To know which types of connections your devices support, you can check your laptop’s info and your monitor’s manual or check online.
How to choose the correct cable for connecting your laptop to your monitor?
Choosing the right cable is important to avoid any connection problems and other issues.
Ensure to consider these things before you buy your cable:
- Choose the right cable: There are three types of cables that are commonly used: HDMI, DisplayPort, and USB-C with DisplayPort Alternate Mode. Check your laptop’s info and your monitor’s manual to know which one to use.
If your monitor supports a higher refresh rate, it will definitely have a display port; check if your laptop supports it or not and buy the correct cable. - Match the ports: Make sure the cable’s ends match the ports on your laptop and monitor.
- Choose the right length: Choose a cable length that suits your needs.
- Choose the right features: Choose a cable that can do what you need it to do. For example, if you want to charge your laptop while it’s connected to the monitor, you should pick a cable with charging capabilities.
- Choose a high-quality cable: Invest in a good-quality cable from a reputable brand. This will ensure that it lasts longer and keeps your electronics safe.
How to connect your laptop to your monitor using cable?
Finally, it’s time to connect your laptop to your monitor.
Here are the steps to connect your laptop and monitor using a USB-C cable:
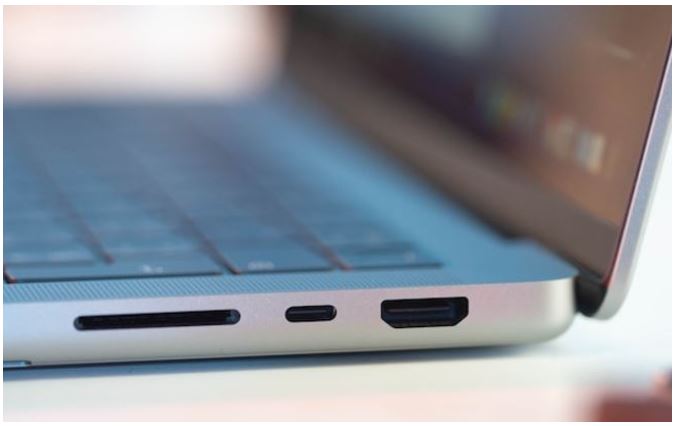
- Locate the USB-C port on your laptop. It might be on the side, back, or even front, depending on your model.
- Find the matching port on your monitor. It should be labeled as well.
- Gently insert the USB-C cable into the USB-C port on your laptop and monitor. Make sure it’s firmly plugged in, but don’t force it.
- Check if your monitor is working. If it is, great! If not, try these troubleshooting tips:
1. Make sure both ends of the cable are firmly plugged in.
2. Double-check that the cable itself isn’t damaged.
3. Make sure your monitor is plugged into a power outlet.
4. Check if you have selected the right input on your monitor. It might have buttons or a joystick to switch between sources.
5. Check the manual or look for labels like “HDMI” or “DisplayPort.”
6. Restart both your laptop and monitor. Sometimes, a little electronic refresh is all it takes. - Power up your monitor (if needed). Some monitors need a separate power cable. If yours does, plug it into an outlet after connecting the USB-C cable.
How to configure your display settings for your monitor setup?
We are finally done with the complete process, and our setup is ready for use. However, for the best experience, we need to make a few additional display settings, which we will discuss now.
The settings may be different for devices; however, let’s discuss them for common operating systems such as Windows 10/11 and MAC OS.
How to configure display settings for Windows 10 and 11
Let’s discuss the steps involved in the configuration and setup of your monitor.
I have used Windows 10 to show you the settings, but the steps are almost the same for Windows 11.
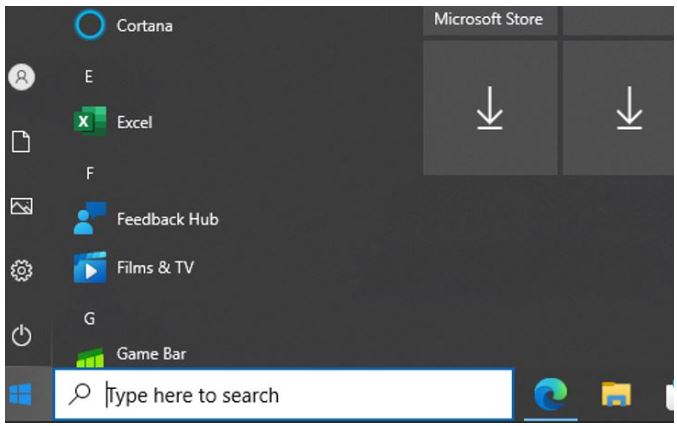
1. Tap the Windows start button and tap the “settings” icon.
2. Click on the “System” icon.
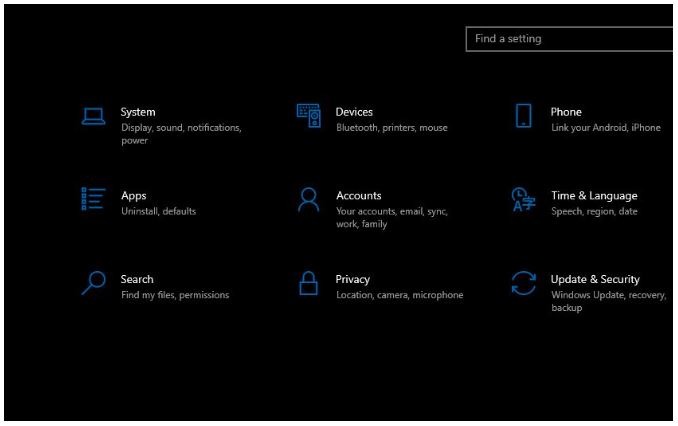
3. Tap on “display settings.”

4. You can change the orientation of the display; you can extend it, duplicate it, and do other settings by scrolling to the bottom.
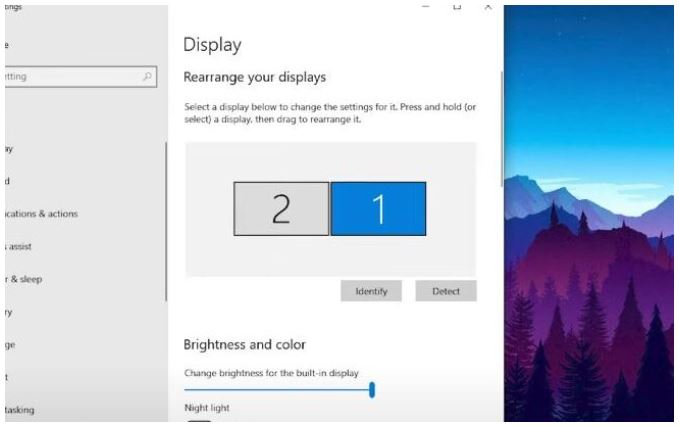
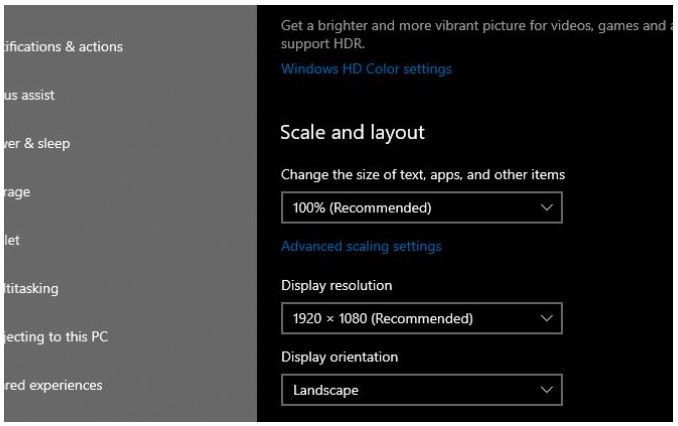
5. Set the resolution as per your monitor’s supported resolution; in my case, it’s 1920×1080. Once all settings are done, scroll down and tap on “Advanced display settings.”
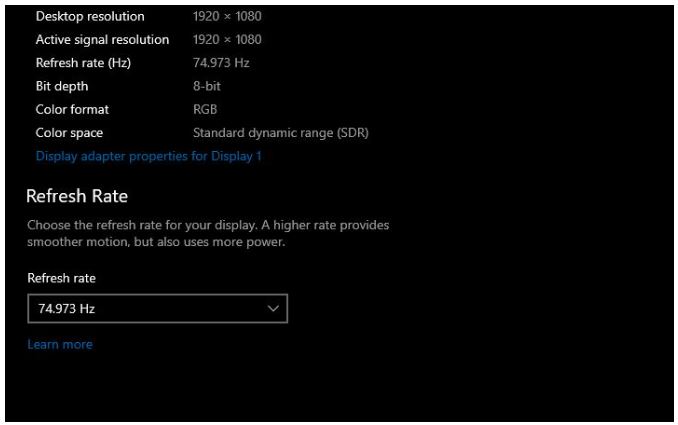
6. You can check your monitor’s details and the refresh rate on which it is currently running. Make sure to change the default refresh rate to maximum if your monitor supports it.
You can enjoy your setup and explore the endless possibilities that you can create with it.
How to configure display settings for Mac OS
The setup process is very easy for Apple devices and works seemlessly. Let’s discuss the steps to do it:
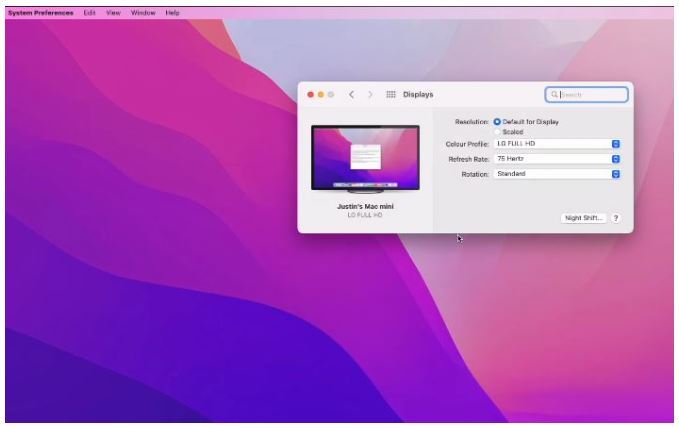
1. Tap the “system preferences” option available at the bottom of the home screen. You can also click on the Apple logo on the top left and click on “System Preferences.”

Look for the “Display” tab and make sure both your laptop and monitor are identified. If not, click “Detect Displays.“
I would recommend keeping the resolution settings on “default for display.” However, if the screen is not visible as it should be, you can change the settings by clicking on the “scaled” option.
You can also change the refresh rate as per your monitor specs.
3. Under “Displays,” click “More Options” and then “Arrangement.” Use the sliders to adjust the relative size and position of your laptop and monitor screens.
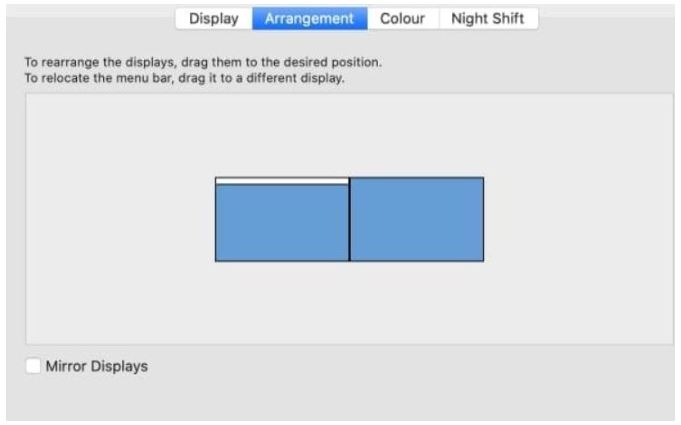
Now, you can enjoy your second display.
Conclusion
Congratulations!! You have learned how to connect a monitor to a laptop with USB-C.
The process itself is very easy; however, it is important to understand how to buy the correct cable and adapters to do it without any issues.
I hope you learned a lot from this blog post and enjoyed your big-screen display.
If you have any feedback to improve my article further, please let me know in the comments section, as it will help me improve my article even further and be helpful.
Thank you for reading and giving your valuable time. Enjoy your day!
Frequently Asked Questions
How can I tell if my laptop’s USB-C port supports video output?
Many laptops have multiple USB-C ports, but not all support video. Look for symbols like a lightning bolt or “DisplayPort” near the port, or check your laptop’s manual or manufacturer’s website.
Can I use a single cable to connect my laptop and monitor for both display and power?
Yes, certain USB-C cables with “Power Delivery” can supply power to your laptop while simultaneously transmitting video. Check your cable and monitor specs to confirm compatibility.
My monitor has a higher resolution than my laptop. How can I adjust it?
Most operating systems allow you to set the display resolution independently for each monitor. You can choose a lower resolution on your laptop for better scaling or prioritize the monitor’s native resolution for sharper visuals.
What troubleshooting steps can I take if my monitor isn’t being detected?
Ensure both cables are securely plugged in, try different ports on your laptop and monitor, check for driver updates, and confirm the correct input source is selected on your monitor.
Can I connect multiple monitors to my laptop using USB-C?
Yes, many laptops support multi-monitor setups through USB-C, either directly or by using docks or hubs. However, check your laptop’s specifications and available ports to ensure compatibility.
Are there any advantages to using DisplayPort over HDMI for connecting my monitor?
DisplayPort offers higher bandwidth and refresh rates, making it ideal for high-resolution displays and gaming. However, HDMI is more common and compatible with a wider range of devices.
Are there any potential downsides to using a USB-C connection for my monitor?
While convenient, USB-C connections may limit your laptop’s charging capabilities if the cable doesn’t support Power Delivery. Additionally, some older peripherals might not be compatible with USB-C ports.
Also Read….
- How Much Storage Should a Gaming Laptop Have? [Ultimate Guide for 2024]
- How to Take Care of Your Gaming Laptop? (19 Proven Tips)
- How Long Do Gaming Laptops Last in 2024? [let’s Find Out]
- What is a Gaming Laptop Used for? [9 Best Uses]
- Are Laptop Keyboards Good For Gaming? [Explained]
- How to Keep Your Laptop Cool While Gaming? [19 Proven Tips]
- Why Do Gaming Laptops Have Bad Battery Life? [9 Reasons]
- What to Do if Your Laptop Battery Lasts Only 1 Hour? (Windows 10 and 11)
- How To Tune A Car With A Laptop In 2024 [Step by Step]
Hi, I’m Vishal, founder of Gaming Bar, your ultimate hub for gaming and tech gear. I am passionate and dedicated to improving your gaming experience and providing honest reviews about gaming and tech products. You’ll find plenty of honest, unbiased reviews, buying guides, and expert opinions presented in an engaging manner. All I ask is that you share my blog posts and support me.