
Hello again, gamers!
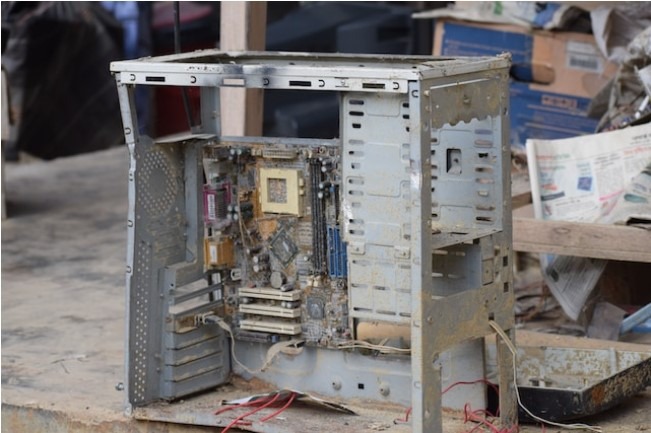
Has your PC case started looking like the one shown above?
Well, that’s looking nasty and unusable. However, if you don’t want your gaming PC case to look like that and want a clean-looking PC case, you’ve come to the right place.
A clean PC case helps in maintaining good airflow, which gives you consistent performance over long hours of gaming.
It will also help in reducing the noise of the cabinet and keep your ears happy.
It will also increase the lifespan of your gaming components, giving you peace of mind.
I usually clean my PC case every 3 months and deep clean it every 6 months. You may follow the same schedule or also do it as per your convenience; there is no fixed rule. It’s better to clean it if you are seeing a lot of dirt inside your case.
In this blog, we’ll discuss how to clean a gaming PC case and squeeze its maximum potential.
So, let’s dive in.
Preparation Time

Let’s gather the essential tools that would ease our cleaning process, all you need is:
- Compressed air can/dry towel/dryer anything is fine.
- Microfiber cloths.
- Isopropyl alcohol (on a cloth, don’t pour it!).
- Cleaning brushes (small and soft).
Safety first
It’s time for an important step:
- Unplug Power: Before you start cleaning, make sure your PC is powerless. Unplug it to avoid any shocking surprises!
- Safety Gear: Ensure to put on your gloves and tie your hair back.
Preparing the workspace
Alright, it’s time to make necessary arrangements before cleaning our PC case.
- Selecting an Ideal Workspace: Ensure a well-ventilated workspace for comfort. A good airflow is beneficial for drying up your PC once you have cleaned it.
- Electrostatic Discharge Prevention: You can protect your PC against electrostatic discharge (ESD) by touching a metal object before handling your computer components. This simple precaution helps prevent potential damage caused by static electricity.
- Organizing Your Tools: Organize your tools systematically. A tidy setup streamlines the cleaning process.
Step-by-Step Cleaning Guide
Let’s discuss the easy steps that you can follow and clean your gaming PC case.
1. Pre Cleaning
To start the cleaning process, first, turn off your PC and disconnect all peripherals, including the power cable, monitor, and keyboard.
Once the external peripherals are removed, open the computer case to access its internals. Remove easily reachable components like drives and cards.
If your case is equipped with dust filters, carefully remove and clean them. Handle with care to avoid any damage.
Make sure to remove the front panel connector as well carefully and make the PC case fully stripped.
With these basic steps completed, your PC case is ready for the main cleaning.
Imagine the satisfaction of a dust-free system and improved performance. Let’s proceed with the cleaning process systematically.
2. Dust Removal Process
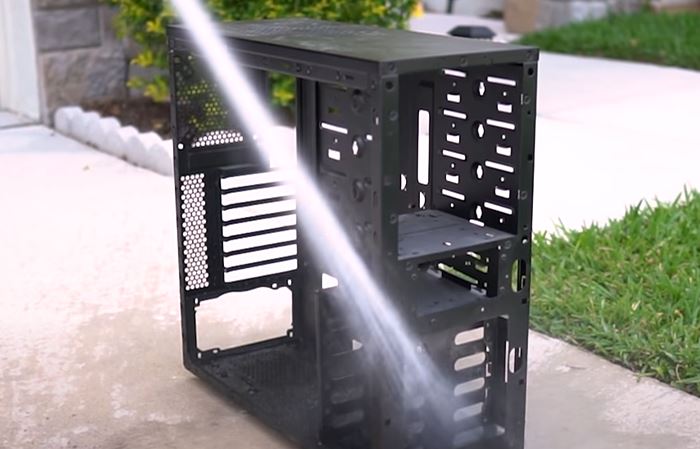
Take your PC case outside your home, set it down near a water hose, and give it a good rinse.
Water tends to make folks a bit nervous around PC components, but your PC case is likely made of coated steel, and a bit of water won’t hurt anything as long as it’s dried immediately after.
Now, if your case is made of cardboard, maybe use a bit of common sense there, and if your case is perhaps just old or made of plastic that you aren’t sure is going to hold up long term, maybe just use a soapy sponge and water instead of a pressurized nozzle.
Once you have washed your case thoroughly, dry it using a dryer or towel.
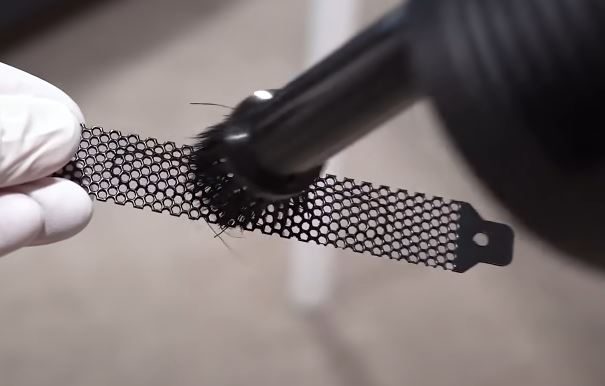
3. Wash the grills
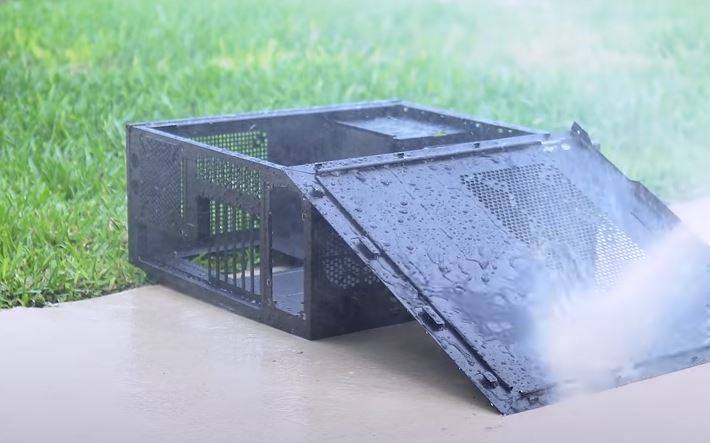
Ensure to wash the grills thoroughly, as they can trap in high dust, as well as the crevices in and around the left and right panel openings.
Make sure not to leave any area and wash each and every part of the case.
4. Wash the front panel
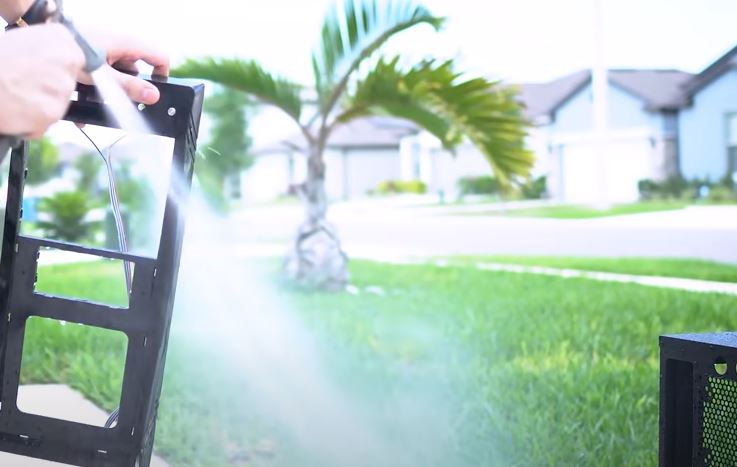
Let’s proceed to the front panel now. If you were able to remove it earlier, prop it against something or hold it out in front of you while spraying.
Once it’s thoroughly washed, repeat the process for the left and right panels. I hope you’ve deduced that you need to remove both before washing, and only wash them if they’re made of the same material as the rest of the chassis.
If you have a glass or tempered glass side panel, set it aside; we’ll scrub it later.
5. Drying your case
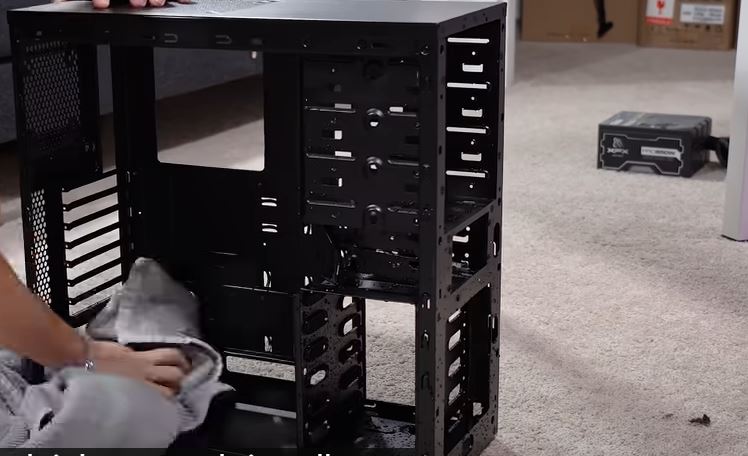
Now, bring all the case pieces together, and dry them thoroughly with a towel or compressed air.
Any remaining droplets will evaporate with time, so set the case aside for now.
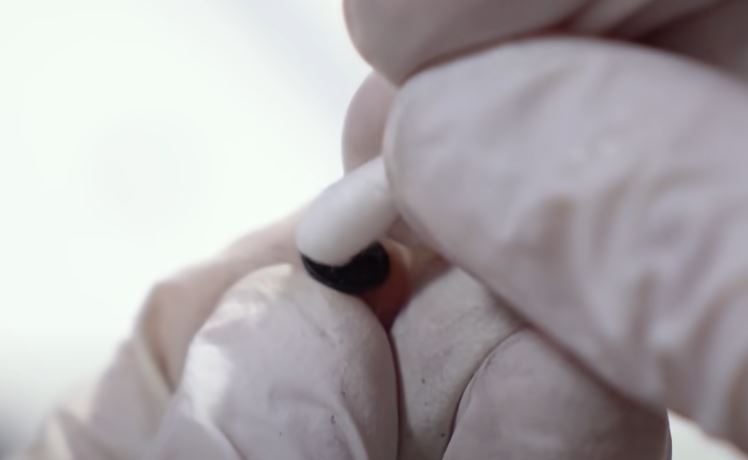
6. Assembling the PCI Slots
Now, let’s grab those dirty old PCI slots you have removed. Chances are, these are pretty grimy, so blast them with compressed air or manually scrub them with IPA and a shop towel.
You could even blast these with water if you wanted, but they’re so small, so I tend to be a bit more precise here.
Repeat the same process for the storage drive trays, modular plastic bits, and the cables you removed earlier.
7. Let’s move on to case screws
You can use a Q-tip dipped in IPA to clean the case screws.
The case screws are notorious for collecting dust as well, and they look pretty awful when not cleaned, especially when the rest of the system is clean.
The Q-tips work really great at soaking up all of this.
8. Clean your side panel
For a few of you, you’ll still have one piece left to clean, and that’s again going to be the left side panel if it’s made of tempered glass.
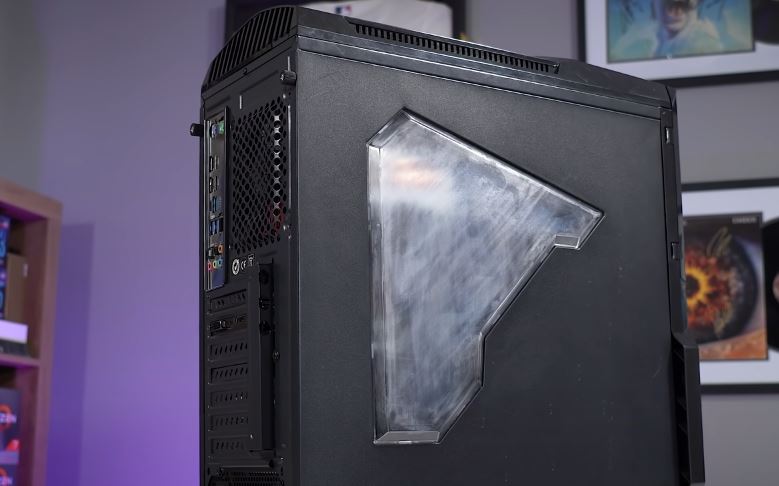
Any glass cleaner will work fine, but if your side panel is made of acrylic, you’ll want to be very gentle and use a microfiber cloth, light pressure, and soapy water.
Don’t use any abrasive chemicals; even sprays like Windex can actually damage the acrylic, and your case may end up looking like the above.
Once you’re done with the cleaning process, let your case completely dry.
9. Reassembly
Now that your PC case is fully clean, It’s time to re-assemble all the components.
- Component Placement: Carefully reinstall all components, such as drives and cards, ensuring they are securely seated. Double-check connections to avoid any wobbling issues.
- Filter Installation: Re-insert the dust filters carefully as they protect against future dust attacks. Confirm that everything is in place before proceeding.
- Reconnection to Peripherals: Restore your PC to its external environment by reconnecting the power, monitor, and keyboard. Ensure a secure and stable reconnection for seamless operation.
- Cable Management: Take a moment to organize your cables systematically. Avoid a messy setup by neatly arranging and securing cables. A tidy configuration enhances the overall aesthetics and functionality of your system.
Remember, a well-assembled PC promotes optimal functionality. Take your time during this process, paying attention to detail, and soon you’ll be back to enjoying a clean and organized gaming setup.
Maintenance and Prevention Tips:
Now, as your PC is dust-free, let’s discuss a few practical tips that would be helpful to maintain your PC and ensure its smooth performance.
Regular cleaning schedule

Let’s ensure to do the following checks for a dust free PC:
- Regular Dust Checks: Conduct quick dust checks every few weeks using a microfiber cloth on accessible areas.
- Deeper Cleaning Every 3-6 Months: Depending on your gaming frequency and environmental dust levels, perform a more thorough cleaning every 3-6 months.
Airflow Optimization
Ensuring your PC stays dust-free is great, but let’s also focus on maintaining optimal airflow for peak performance.
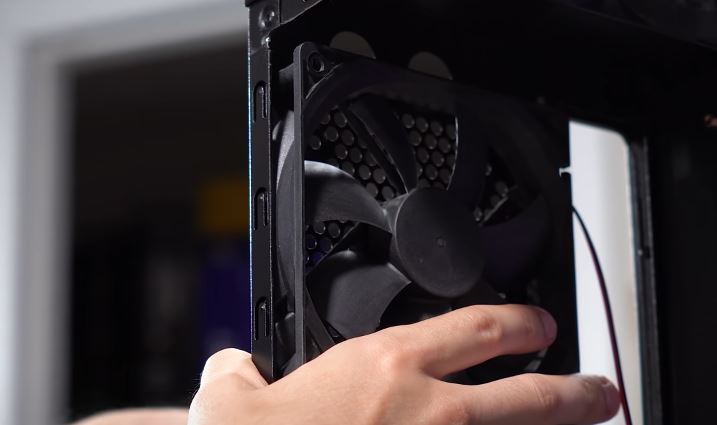
- Check Fan Placement: Verify that your case fans are strategically placed to draw in cool air from the front and eject warm air from the back and top. If not, consider rearranging them for improved air circulation.
- Consider Additional Fans: Boosting your airflow is like installing AC for your PC. If needed, add more case fans, ensuring they match the size and type of existing fans for good airflow.
- Dust Filter Maintenance: Dust filters play a vital role in preventing dust buildup. Invest in quality filters and clean them regularly to ensure uninterrupted airflow.
Good airflow helps keep your computer cool, quiet, and working at its best. Change the fan settings if needed, think about adding extra cooling parts, and clean the air filters often to keep your computer happy and games running smoothly for a long time.
Environmental Considerations

Having conquered the initial dust challenge, it’s important to adopt measures for ongoing cleanliness in your gaming area.
Let’s delve into maintaining a clean environment with practical steps:
Choose a Clean Gaming Space: Opt for gaming areas away from dusty vents or construction zones. Consider a daily vacuum routine to remove your floor dust efficiently.
Implement Additional Measures: Treat dust as a potential issue by adopting extra precautions. Air purifiers can aid in filtering air before it reaches your PC components, while a dust cover acts as a shield while you are not using your PC.
Remember, a well-maintained environment minimizes the need for extensive cleaning in the future.
Organize your space, consider air-cleaning solutions, and cover your PC during downtime for uninterrupted performance.
Adopt these simple strategies to fend off dust and ensure a consistently clean gaming setup.
Conclusion:
Once you are done with the entire cleaning process, ensure to admire your work; regardless of how expensive or cheap your case was to begin with.
There’s nothing as satisfying then to see a day and night difference between what was once extremely dirty and what shows now as spotless and glossy PC.
I hope this blog has helped you in cleaning your PC case and has made your day.
Now, you can enjoy working on your PC and work/have fun as usual.
FAQs (Frequently Asked Questions)
How often should I clean my PC?
Every 3-6 months, depending on usage and environment.
Can I use a vacuum cleaner to clean my PC?
Yes, with a brush attachment, but be gentle!
Is it safe to use compressed air on my PC?
Yes, in short bursts, but avoid spinning fans.
What are some signs my PC needs cleaning?
Slow performance, loud fan noise, overheating.
Can I prevent dust from entering my PC?
Use dust filters, keep your environment clean, and avoid smoking near your PC.
What are some benefits of cleaning my PC?
Improved performance, quieter operation, longer lifespan for components.
Do I need special tools to clean my PC?
Nope! Microfiber cloth, can of air, maybe screwdriver.
Is it okay to eat snacks while gaming?
Dust magnet! Clean keyboard often.
Should I upgrade my cooling if my PC runs hot?
Clean first! Upgrade later if needed.
Also Read….
- How To Add a USB-C Port To a PC Case Front Panel [Step by Step]
- How to Install an LCD Screen in Your PC Case [Step by Step]
- 7 Best Gaming Cabinet Under 4000 in India [2024]
- How to Fix PC Case Fans Not Spinning: 9+ Easy Steps
- How to Paint Your PC Case Like a Pro [Step by Step]
- Best Fan Configuration for Gaming PC Case [2023]
- How to Make a Gaming PC Case More Silent: 9 Proven Tips
- How to Manage Cables in a Gaming PC Case: The Ultimate Guide
- How to Choose the Best PC Case for Your Needs: The Ultimate Guide [2023]
Hi, I’m Vishal, founder of Gaming Bar, your ultimate hub for gaming and tech gear. I am passionate and dedicated to improving your gaming experience and providing honest reviews about gaming and tech products. You’ll find plenty of honest, unbiased reviews, buying guides, and expert opinions presented in an engaging manner. All I ask is that you share my blog posts and support me.