![How to Build a Custom Gaming Keyboard [Step by Step] How to Build a Custom Gaming Keyboard [Step by Step]](https://gamingbar.in/wp-content/uploads/2024/02/How-to-Build-a-Custom-Gaming-Keyboard-2.jpg)
Are you tired of those boring and plain-looking stock keyboards that no longer excite you?
If yes, then get ready for a change because we’re about to dive into the world of custom gaming keyboards.
These aren’t your average keyboards; they’re like a blank canvas waiting for your personal touch.
So, what is a custom gaming keyboard?
You can think of it as a keyboard designed and made by your hands, which reflects your creativity, complementing your style and gaming setup.
You might be wondering, “Why should I bother making my gaming keyboard?”
That’s a great question!
Crafting your keyboard sets you apart from the crowd, and dive into a world of customization, better performance, and aesthetics that match your taste.
In this blog post, we’ll explore the fantastic benefits of a custom gaming keyboard, like super-fast response times and eye-catching designs.
We’ll also guide you through the entire process of how to build a custom gaming keyboard without any hassle.
Get ready to supercharge your gaming experience!
Decide What Keyboard You Want.

Building a custom mechanical keyboard starts with choosing the right components. The first step is to decide what size and features you want.
Keyboard size
Keyboards come in a variety of sizes, from 60% to full-size. Smaller keyboards are more portable, while larger keyboards offer more functionality. Choose a size that fits your needs and preferences.
Features
Consider what features are important to you. Do you want a keyboard with RGB lighting? QMK firmware? A certain type of USB port? Choose features that will make your keyboard more enjoyable to use.
Once you have chosen the right components, you can start assembling your custom mechanical keyboard!
What Components You Need to Build a Custom Gaming Keyboard?
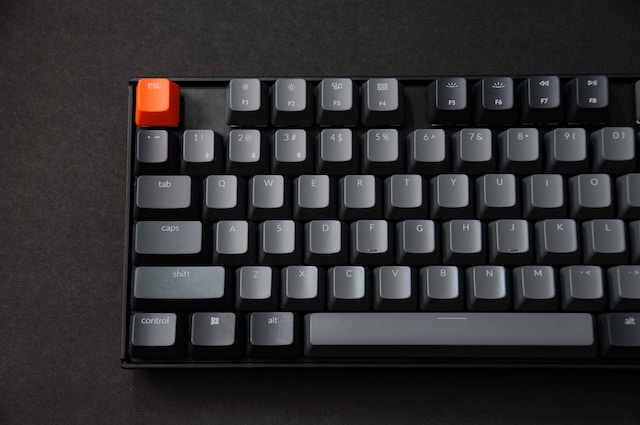
Alright, welcome to the next step of your exciting journey towards building your custom gaming keyboard!
Now that you’ve decided what size and features you want, it’s time to dive into the nitty-gritty of selecting the essential components that will bring your keyboard to life.
Picking out the right parts is where the magic happens.
It’s like choosing the ingredients for your favorite dish, except in this case, you’re crafting the keyboard of your dreams.
Each component plays a unique role, and getting them right is crucial for a smooth and satisfying typing experience.
What are the main components required for your custom gaming keyboard?
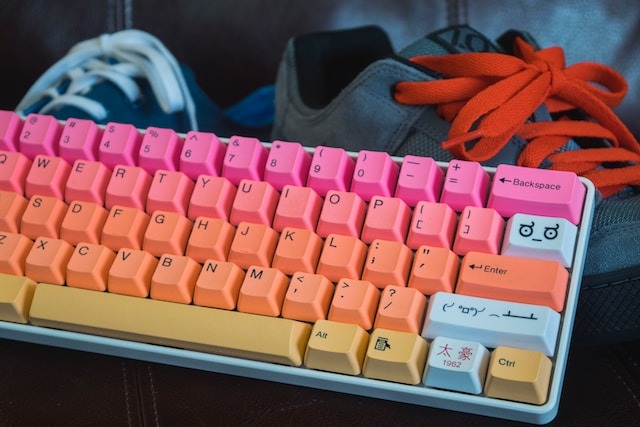
Let’s break down the main components you’ll need and why they matter. Think of it as building blocks for your keyboard masterpiece:
PCB (printed circuit board): This little wonder is like the brain of your keyboard. It determines the size, features, and layout. It’s where all the keypresses are registered. Remember, choose wisely!
Case: The case is what holds everything together and protects it from the elements. You’ve got options like plastic, aluminum, and more. The material affects durability and aesthetics, so consider your preferences.
Plate: An optional but highly recommended part. The plate holds the switches in place, adding rigidity to your keyboard. There are different materials like aluminum, steel, and brass. It can also impact the typing feel.
Stabilizers: These heroes prevent your larger keys from wobbling and ensure a smooth, consistent typing experience. Don’t underestimate their importance; they can make or break your keyboard’s feel and sound.
Switches: Now, this is where the fun begins. Switches define the character of your typing. You’ve got a world of options here, from smooth linear to clicky and tactile switches. It’s all about personal preference.
Keycaps: These are the clothes your keyboard wears. They come in different materials (ABS or PBT), profiles, designs, and colors. What you choose can dramatically affect the look and feel of your keyboard.
Importance of Compatibility Between Components

Here’s the deal: your keyboard components need to play nice with each other.
Imagine trying to build a puzzle with pieces that don’t fit. It can be a frustrating experience.
So, ensure that your PCB, case, plate, and keycaps all work together harmoniously.
Personalization Options for Each Component
Now, the cool part – personalization! Your keyboard is an extension of your personality, and you can make it uniquely yours:
- PCB: Choose one that suits your layout and switch preferences.
- Case: Pick a material and style that matches your setup.
- Plate: Consider how it impacts your switches and typing feel.
- Stabilizers: Opt for the ones that match your switch choice and typing style.
- Switches: Experiment with different types until you find your perfect match.
- Keycaps: Express yourself with colors, designs, and profiles that resonate with you.
Remember, building a custom gaming keyboard is all about creating a tool that feels just right for you.
So, take your time, explore your options, and get ready to assemble the keyboard you’ve always wanted.
Let’s discuss each of the components in depth, so you can choose the correct one for your build.
PCB (Printed Circuit Board) Selection
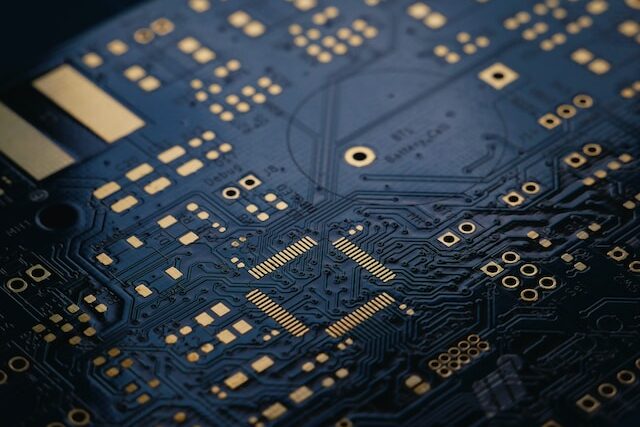
Now, let’s look at one of the crucial parts of your custom gaming keyboard: the PCB.
This is where the real magic happens, and understanding its role is key to building your dream keyboard.
Role of the PCB in Keyboard Functionality:
The PCB (Printed Circuit Board) acts as the brain of your keyboard, making sure every keypress gets registered and sent to your computer.
When you tap a key, the PCB is the one that tells your computer, “Hey, they just pressed the ‘A’ key!” So, it’s kind of a big deal.
Types of PCBs
Now, let’s talk flavors of PCBs, shall we?
- Standard PCB: This is the usual choice for most keyboards. You’ll need to solder the switches onto it. Think of it as putting together building blocks – it’s strong and dependable. Plus, you can change the layout as you like. Want a split spacebar? No problem!
- Hot-Swappable PCB: If soldering isn’t your thing (completely understandable), this is a game-changer. With hot-swappable PCBs, you can simply snap the switches in place – no soldering required! It’s fast, easy, and great for beginners. Keep in mind, though, that you may have fewer layout choices compared to a standard PCB.
- Through-Hole PCB: This one’s for the DIY enthusiasts. It’s like a challenging craft project. You’ll need to solder everything, including diodes, resistors, and more. Not recommended for beginners, but it’s a satisfying way to create a highly customized keyboard.
How to Choose the Right PCB for Your Keyboard
You’ve got the PCB options, but how do you pick the perfect one? Here’s the scoop:
- Standard PCB: If you’re all about making your keyboard unique, love having lots of layout choices, and don’t mind soldering (or are willing to learn), this one’s for you. It’s like your blank canvas for creating a one-of-a-kind keyboard masterpiece.
- Hot-Swappable PCB: If soldering gives you the jitters or you want a quick and easy setup, this is like the “plug and play” option for custom keyboards. Just remember, you might have fewer layout choices compared to standard PCBs.
- Through-Hole PCB: Advanced users, this is your playground. If you’re itching to get hands-on with every part of your keyboard and enjoy a bit of a challenge, this can be a really rewarding choice.
So, whether you’re a soldering pro or a hot-swappable fan, there’s a PCB out there that’s just right for you.
Choose wisely, and you’ll be one step closer to building the gaming keyboard of your dreams.
Keyboard case selection
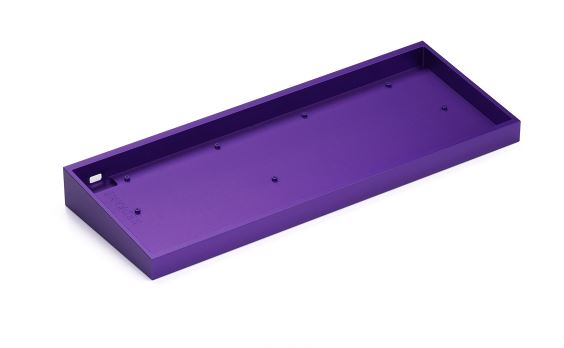
The keyboard case is the outer shell of your keyboard.
Apart from giving the best looks, It protects the internal components and also plays a big role in the keyboard’s overall feel and sound.
Here’s a quick guide to the different case options available:
Materials:
- Plastic: Plastic cases are the most affordable and lightweight option. They’re a good choice for budget-minded gamers and those who need a portable keyboard. However, plastic cases can be less durable than other materials and may produce a more rattly sound when typing.
- Aluminum: Aluminum cases are more expensive and heavier than plastic cases, but they’re also more durable and produce a more solid sound. Aluminum cases are a good choice for gamers who want a premium feel and performance.
Mounting Styles:
Now, let’s talk about how your keyboard sits inside the case. It’s like choosing the suspension for your car – it affects how it feels.
- Gasket mount: Gasket mount cases use rubber gaskets to absorb vibration and noise. This results in a softer, more cushioned typing feel. Gasket mount cases are the most expensive option, but they offer the best typing experience.
- Tray mount: Tray mount cases are the simplest and most affordable type of case. They use a metal tray to mount the keyboard’s PCB and plate. Tray mount cases produce a more direct and responsive typing feel, but they can also be more noisy.
When choosing a keyboard case, there are a few factors to consider:
- Durability: If you’re looking for a durable case that can withstand a lot of wear and tear, aluminum is the best choice. Plastic cases are less durable, but they’re also more affordable.
- Weight: If you need a portable keyboard, a plastic case is the best option. Aluminum cases are heavier, but they’re also more durable.
- Sound: Gasket mount cases produce the best sound, but they’re also the most expensive. Tray mount cases are less expensive, but they can be more noisy.
The best keyboard case for you will depend on your budget, needs, and preferences.
If you’re looking for the best possible typing experience, a gasket-mount aluminum case is the way to go.
If you’re on a budget or need a portable keyboard, a plastic case is a good option.
Plate Selection: The Backbone of Your Keyboard
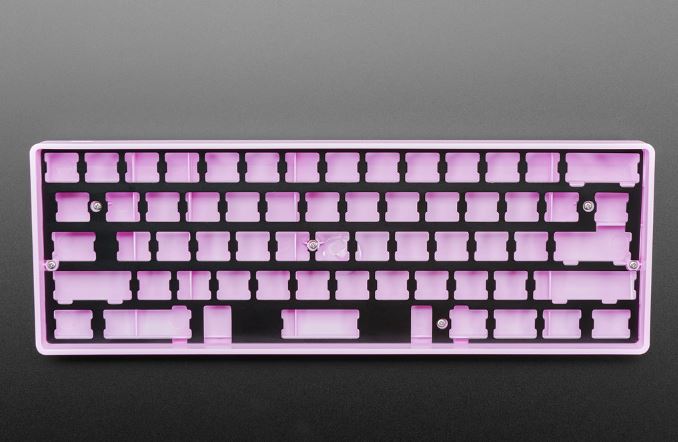
The keyboard plate is the backbone of your keyboard’s structure. It keeps your switches in place and adds that sturdy feel to your typing experience.
What materials are keyboard plates made of?
Keyboard plates are typically made of aluminum, steel, brass, or carbon fiber. Each material has its own unique properties that affect the typing feel.
- Aluminum: Aluminum plates are rigid and sturdy, providing a stable typing platform.
- Steel: Steel plates are similar to aluminum plates, but they’re even more durable and stable.
- Brass: Brass plates are heavy and add a touch of class to your keyboard. They provide a stable typing experience and a unique sound profile.
- Carbon fiber: Carbon fiber plates are lightweight and flexible. They offer a unique typing experience that’s like driving a high-performance sports car.
Flexibility vs. rigidity
Flexibility and rigidity are the yin and yang of plate selection. Rigid plates offer stability and precision, while flexible plates can add some bounce to your typing.
Which plate is right for you?
It depends on whether you prefer a smooth, controlled ride or a bouncy, adventurous one.
Stabilizers and Their Crucial Role
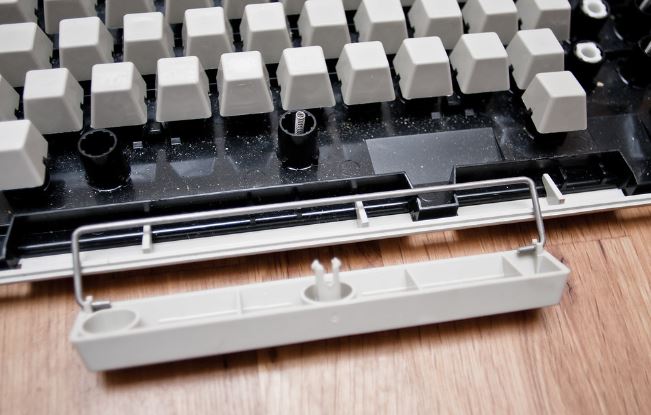
Stabilizers are hidden components in your keyboard that make typing smoother.
What exactly do stabilizers do?
Without stabilizers, longer keys like the spacebar would wobble like a seesaw. Stabilizers prevent this wobbling and give all your keys a steady feel.
What are the types of stabilizers?
There are three main types of stabilizers:
- Plate-mounted: These stabilizers attach to a metal plate above the keyboard’s circuit board. They’re common but not the best for typing comfort.
- Screw-in: Screw-in stabilizers secure directly into the circuit board, making for the most stable typing experience.
- Snap-in: These snap into the circuit board and are decent but may allow a bit more wobble compared to screw-in stabilizers.
Choosing the right stabilizers
The key to picking stabilizers is compatibility.
If your keyboard’s circuit board allows you to change switches easily (hot-swappable), you usually need plate-mounted stabilizers.
So, match your stabilizers to your setup like peanut butter and jelly. Using the wrong ones can make typing less enjoyable.
In a nutshell, Stabilizers might not be the stars, but they’re the backstage crew ensuring everything runs smoothly.
Getting to Know Your Switches
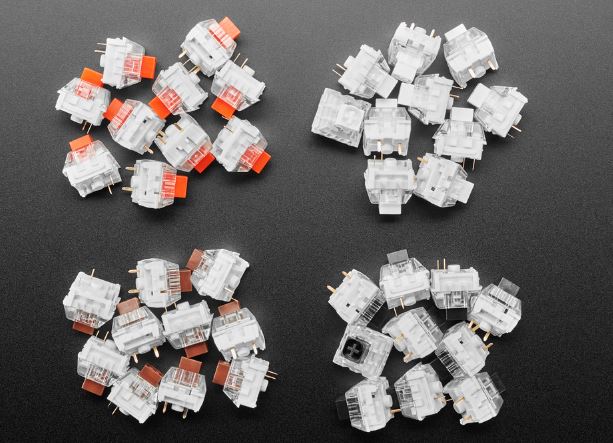
Alright, fellow keyboard enthusiasts, let’s dive into the world of switches – the heart and soul of your gaming keyboard.
What are the types of switches?
There are three main types to choose from:
- Linear: These switches offer a smooth and consistent keystroke with a quiet sound. Think of them as the ninja of switches.
- Tactile: With tactile switches, you’ll feel a small bump with every keystroke. They’re like your keyboard’s way of saying, “Hey, I got your input!”
- Clicky: Clicky switches also have that tactile bump but add a loud click noise for extra flair. If you want your keyboard to announce your typing, clicky switches are the way to go.
Meet the Brands
Now, let’s talk brands. You’ve got options like Cherry MX, Gateron, NovelKeys, ZealPC, and more. Each brand has its unique characteristics, like a keyboard personality.
Switch Preference Matters
Choosing the right switch is like picking the perfect pair of shoes – it’s all about personal preference.
Your switch choice can make or break your typing experience, so take your time to find the one that clicks (or doesn’t click) with you.
There you have it, a crash course in switches.
Now go out there and find the one that makes your typing dreams come true!
Keycap Considerations
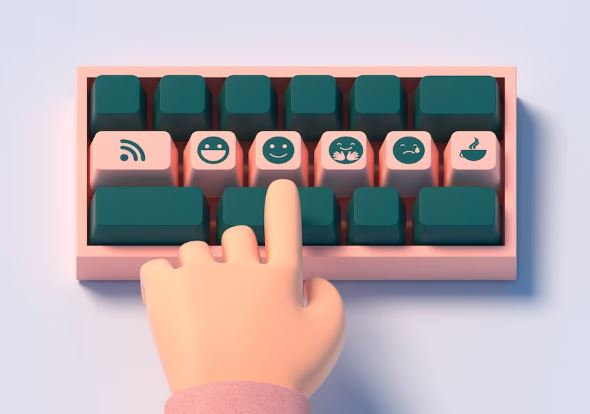
Now, let’s talk about the cherry on top – your keycaps.
These little guys are what you’ll be tapping away on, so choosing the right ones is very important.
Keycap Materials
You’ve got two main materials to pick from:
- ABS: These keycaps are durable and smooth but might wear out over time.
- PBT: Known for their durability, PBT keycaps are the tougher sibling, resistant to wear and tear.
Keycap Profiles
Next up, keycap profiles:
- Uniform: These keycaps have a consistent height, which some folks find comfortable.
- Sculpted: Sculpted keycaps vary in height, making it easier for your fingers to find the right keys.
Design and Aesthetics
Last but not least, the fun part! Keycaps come in all sorts of colors and designs.
You can match them to your setup or go wild with vibrant hues. It’s your keyboard’s fashion statement.
So, when it comes to keycaps, think about your typing style, durability needs, and artistic flair.
How to choose the right keycaps
When choosing keycaps, consider your typing style, durability needs, and aesthetic preferences.
Do you want something that feels smooth and comfortable or something that’s ultra-durable? Do you want something that matches your keyboard setup perfectly or something funky and unique?
Once you’ve considered all of these factors, you’ll be well on your way to choosing the perfect keycaps for your keyboard.
Getting the Equipment Required
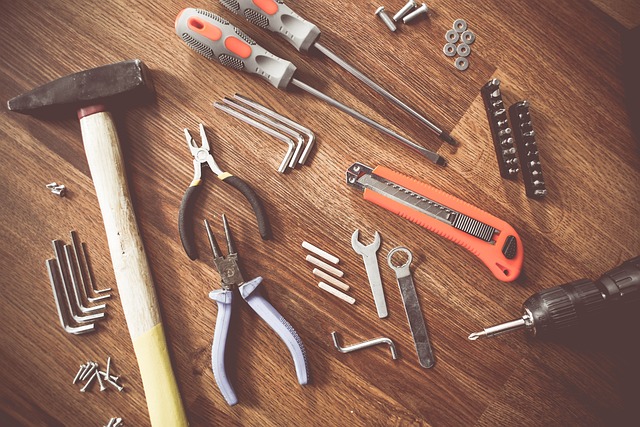
Now that you know what you need to put a keyboard together, let’s get ready for the assembly!
Essential Tools
You’ll need these trustworthy tools:
- Soldering Iron: This hot tool connects the electrical parts.
- Solder Sucker: If you make a mistake while soldering, this tool can fix it.
- Solder Wire: It’s like the glue that holds your keyboard together.
- Switch Puller: This tool helps you easily install and remove switches.
These tools are like your keyboard-building buddies.
Nice-to-Have Tools
If you want to take your DIY skills up a notch, consider these:
- Soldering Stand: It keeps your soldering iron safe.
- Heat-Insulated Mat: Protects your workspace from heat.
- Magnetic Holding Trays: Keeps screws and bits from running away.
These tools make the building process smoother and safer. Think of them as the finishing touch on your keyboard creation!
Tools for Lubing & Filming Switches
If you’re into customizing, these tools are for you:
- Switch Opener: It helps you take switches apart for customization.
- Switch Films: Tiny pieces that improve switch performance.
- Switch Lube: Keeps everything working smoothly and quietly.
Customizing switches is like giving your keyboard a spa day – it’ll thank you later!
Tools for Modding Stabilizers
Stabilizers need attention too! Grab these tools:
- Fabric Bandaids: Surprisingly, they reduce rattling.
- Flush Cutters: Trim excess parts like a pro.
- Stabilizer Lube: Keeps stabilizers silent.
Modding stabilizers are like giving your keyboard a smoother ride.
Tools for Sound Dampening
If you want a quieter typing experience, check out these tools:
- Neoprene Sponge: Softens the noise.
- Desk Mat: Reduces noise and looks stylish.
- Sorbothane: The ultimate noise absorber.
Finally, It’s showdown time!!
We’ll begin with the process of building our keyboard from here on, please pay attention !!!!
Test PCB to Check if it Works Properly
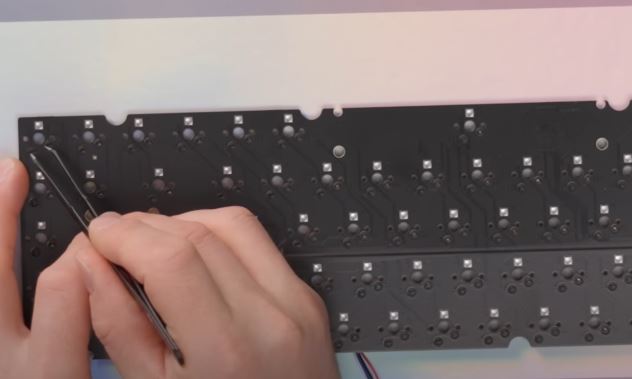
Now that you’ve assembled your keyboard, it’s time to test it out and make sure everything is working properly.
1. Connect the PCB to your computer. Use a USB cable to connect the PCB to a port on your computer.
2. Turn on the PCB. If your PCB has LEDs or RGB lighting, make sure they light up.
3. Test each switch. Press each switch one by one to make sure they all register keypresses.
4. Type a few sentences. Type a few sentences to make sure that everything is working smoothly. Typos happen, but let’s hope for a smooth ride!
You can test your PCB by using this free site which allows you to test each switch and key on your keyboard.
Troubleshooting Common Issues
If you encounter any problems while testing your keyboard, here are a few things to check:
- Dead keys: If a key doesn’t respond, check if it’s properly soldered. Sometimes, they just need a little extra love.
- Random keypresses: If keys trigger without your command, inspect for solder bridges – these connections can be a bit too friendly.
- RGB mysteries: If your PCB has RGB lighting, and it’s acting up, recheck the connections and drivers.
Remember, patience is your best friend during this step. It’s like tuning a musical instrument; you want every note (or key) to sound just right!
Ensuring Smooth Key Registration
Once you’ve tested your keyboard and fixed any problems, you can be sure that your keys will register smoothly every time you press them.
This is like making sure each member of your keyboard orchestra plays their part perfectly. After all, you don’t want any missing notes when you’re typing your masterpiece!
Lube Your Switches (Optional)
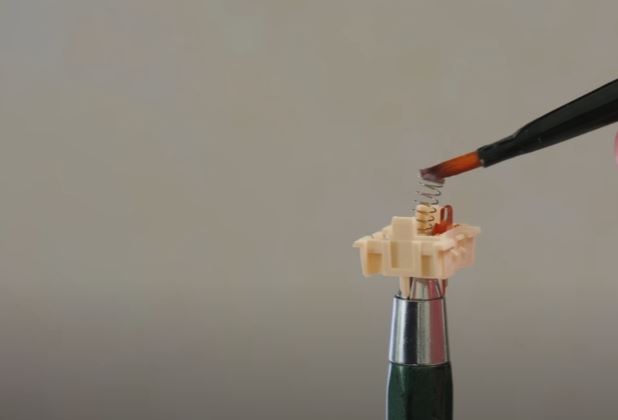
Lubing your keyboard switches is an optional step, but it can make a big difference in the typing experience.
It’s like adding silk sheets to your bed – it’s not necessary, but it sure feels good.
What is lubing?
Lubing is the process of applying a specialized grease to your keyboard switches. This reduces friction and makes your keypresses smoother and quieter.
Why lube your switches?
There are a few benefits to lubing your keyboard switches:
- Smoother typing: Lubed switches feel smoother and more responsive, like sliding on an ice rink without the cold feet.
- Reduced friction: Less friction means less wear and tear on your switches, prolonging their life.
- Quieter typing: Lubed switches are often quieter, so you can type away without disturbing the peace.
How to lube your switches?
If you decide to lube your switches, here’s a step-by-step guide:
- Open the switches carefully using a switch opener.
- Apply a tiny amount of lube to the moving parts inside the switch housing. Less is more here!
- Close up the switches and you’re done.
Is lubing worth it?
Whether or not lubing your switches is worth it depends on your personal preferences.
If you’re looking for the smoothest, quietest typing experience possible, then lubing is worth it.
However, if you’re happy with the way your keyboard feels and sounds already, then lubing is not necessary.
It’s up to you to decide if you want to indulge in this extra step of luxury for your keyboard!
Modding Your Stabilizers (Optional)
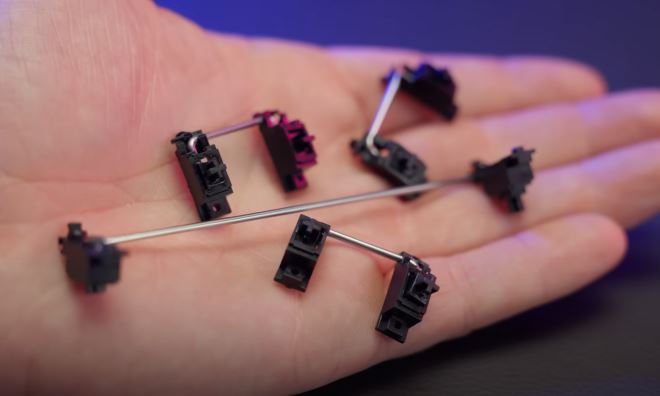
Stabilizer modding is an optional step, but it can make a big difference in the typing experience.
It’s like soundproofing your keyboard’s room, making it quieter and more stable.
What is stabilizer modding?
Stabilizer modding is the process of fine-tuning your keyboard’s stabilizers.
Stabilizers are the components that help larger keys, like the spacebar and shift keys, feel stable and prevent them from wobbling.
Why mod your stabilizers?
There are a few benefits to modding your stabilizers:
- Quieter typing: Stabilizer modding can make your keyboard quieter, especially when typing on larger keys. This is because it reduces the amount of rattle and vibration.
- More stable typing: Stabilizer modding can also improve the stability of your keyboard’s larger keys. This means that they will feel more solid and less wobbly when you press them.
- More comfortable typing: A modded keyboard can offer a more comfortable typing experience overall. This is because the keys will feel smoother and more responsive.
How to mod your stabilizers?
If you decide to mod your stabilizers, here’s a basic guide:
- Apply a dampening material, like fabric bandaids, to your PCB. This will help to reduce noise and vibration.
- Trim and lube your stabilizers. This will make them move more smoothly and quietly.
- Assemble your keyboard and you’re done!
Is stabilizer modding worth it?
Whether or not stabilizer modding is worth it depends on your personal preferences.
If you’re looking for the quietest, most stable typing experience possible, then stabilizer modding is worth it.
However, if you’re happy with the way your keyboard feels and sounds already, then stabilizer modding is not necessary.
It’s up to you to decide if you want to take the plunge into stabilizer modding. But if you do, you won’t be disappointed!
Install Stabilizers Into PCB
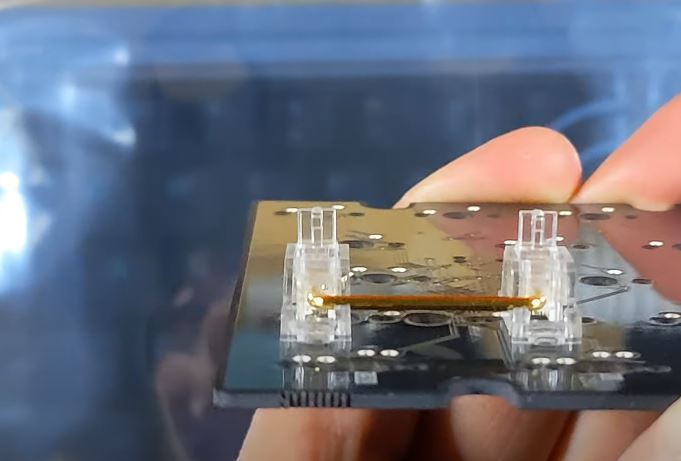
Installing stabilizers is a delicate process, but it’s important to make sure they’re attached properly to the PCB.
Otherwise, your keys will be wobbly and your typing experience will suffer.
To install your stabilizers, simply follow these steps:
- Position the stabilizer in the correct spot on the PCB.
- Gently press the stabilizer into the PCB until it’s flush.
- Secure the stabilizer with a screw or clip.
- Repeat steps 1-3 for all of your stabilizers.
Once you’ve installed all of your stabilizers, test out your keyboard to make sure they’re working properly.
You should be able to press each key without any wobbling.
Install Switches Into Plate & PCB
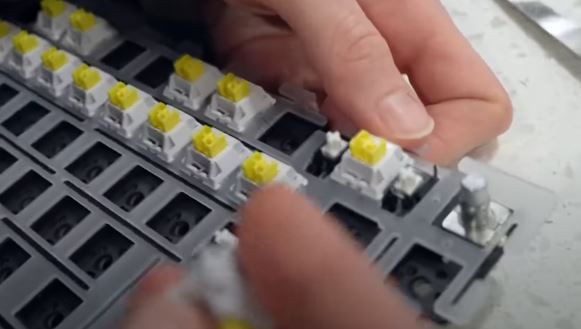
Installing your keyboard switches is a crucial step in the building process.
It’s where your keyboard starts to take shape and your typing experience comes to life.
Think of switches as the heartbeat of your keyboard. They’re the keys to your typing kingdom. That’s why it’s important to take your time and get them installed snugly and securely.
Here’s a step-by-step guide:
- Gather your supplies: switches, plate, and PCB.
- Position the switch in the designated spot on the plate and PCB.
- Gently press the switch into the plate and PCB until you hear a satisfying snap.
- Pay attention to the orientation of the switch; it should be aligned correctly.
- Double-check all of your switches to make sure they’re secure.
- Gently press each switch down to feel the click.
Once you’ve installed all of your switches, your keyboard will start to feel personalized and ready to rock!
Tips:
- Be careful not to overtighten the switches, as this can damage them.
- If you’re having trouble installing a switch, try using a switch puller to help you loosen it up.
- Make sure to test each switch after you install it to ensure that it’s working properly.
With your switches in place, you’re one step closer to your custom keyboard dream!
Solder Switches (if needed)
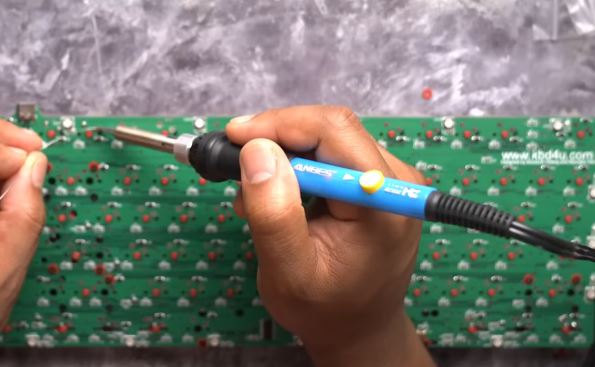
If you have a non-hot-swappable PCB, you’ll need to solder your switches in place.
This may sound daunting, but it’s not as difficult as it seems. With a little practice, you’ll be soldering like a pro in no time!
What is soldering?
Soldering is a technique used to join two metal parts together using a molten metal alloy called solder. In the context of keyboard building, soldering is used to attach the pins of the switches to the contact points on the PCB.
How to solder switches?
To solder your switches, you’ll need the following:
- A soldering iron
- Solder wire
- A steady hand
Here’s a step-by-step guide:
- Turn on your soldering iron and let it heat up.
- Place the switch in the designated spot on the PCB.
- Heat up the switch’s pins and the corresponding contact points on the PCB.
- Apply a small amount of solder to the joint.
- Hold the solder in place until it melts and flows around the joint.
- Remove the soldering iron and allow the solder to cool and solidify.
Once you’ve soldered all of your switches, inspect your solder joints to make sure they look smooth and shiny. If any of the joints look dull or grainy, reheat them and add a bit more solder.
With your switches soldered in place, you’re one step closer to completing your custom keyboard build!
Tips:
- Be careful not to overtighten the switches, as this can damage them.
- If you’re having trouble soldering a switch, try using a switch puller to help you loosen it up.
- Make sure to test each switch after you solder it to ensure that it’s working properly.
Add Foam and Rubber Feet to The Case
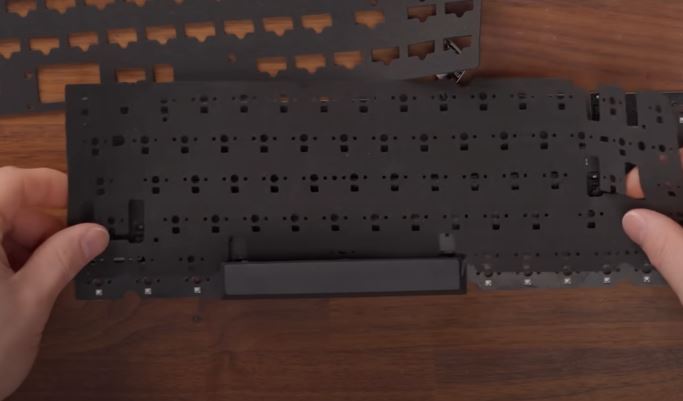
Now it’s time to add foam and rubber feet to your keyboard case.
These simple additions can make a big difference in your typing experience and overall satisfaction with your keyboard.
Foam
Adding a foam layer to the inside of your case can help to dampen sound and reduce noise. This is especially beneficial if you’re using a keyboard with clicky switches.
Rubber feet
Rubber feet attached to the bottom of your case can help to keep your keyboard from slipping and sliding around on your desk. They also elevate your keyboard slightly, which can create a more ergonomic typing angle.
Installation
To install foam and rubber feet, simply follow these steps:
- Cut a piece of foam to fit the inside of your case.
- Place the foam in the case.
- Attach the rubber feet to the bottom of the case.
That’s it! You’ve now added foam and rubber feet to your keyboard case for a more comfortable and stable typing experience.
Tips:
- Make sure to use a soft foam that won’t put too much pressure on your PCB and switches.
- If you’re having trouble attaching the rubber feet, you can use a bit of double-sided tape.
- Be careful not to overtighten the screws when attaching the rubber feet, as this can damage them.
Install Assembled PCB Into Case
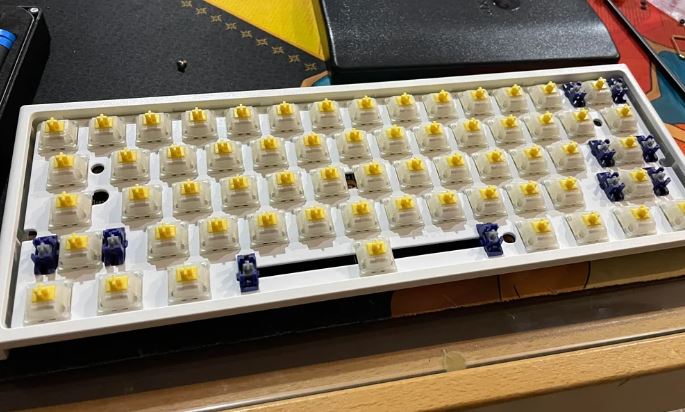
You’ve come a long way, and now it’s time to complete your masterpiece: installing the assembled PCB into the case.
This is the final step in your gaming keyboard-building journey, and it’s where all your hard work pays off.
How to install the PCB?
- Carefully place the PCB into the case, making sure that all of the components fit snugly.
- Double-check to make sure that nothing is loose or out of place.
That’s it! You’ve now installed the PCB into the case, and your custom gaming keyboard is complete!
Tips:
- Be careful not to overtighten the screws when securing the PCB to the case, as this can damage the components.
- If you’re having trouble installing the PCB, try using a different screwdriver or adjusting the angle of the case.
Install the Keycaps – Adding The Final Touch
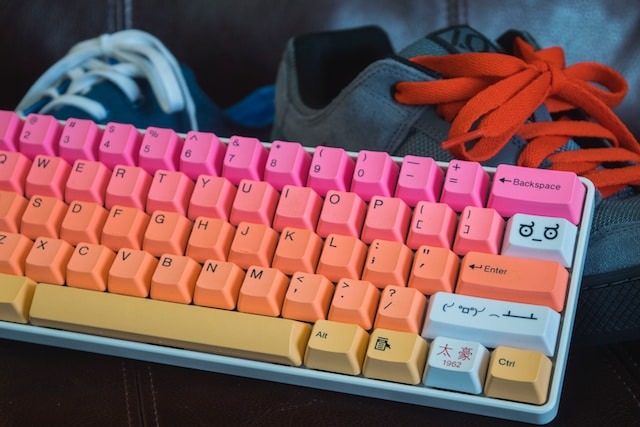
The keycaps are the final touch to your custom mechanical keyboard.
They’re what you’ll be typing on, so it’s important to choose ones that you love and that feel good under your fingers.
Keycaps: Form and Function
Keycaps come in a wide variety of materials, colors, and designs.
Some keycaps are made of ABS plastic, while others are made of PBT plastic.
ABS keycaps are more common and affordable, but they can wear out over time.
PBT keycaps are more durable and resistant to wear and tear, but they’re also more expensive.
Keycaps also come in different profiles, which affects the way they feel and sound when you type.
Uniform profiles have the same height for all keys, while sculpted profiles have different heights for different rows of keys.
Some people find uniform profiles to be more comfortable, while others prefer sculpted profiles.
Installing Keycaps
To install keycaps, simply place them over the switches and press down until they snap into place. Be careful not to overtighten the keycaps, as this can damage them.
Tips:
- If you’re having trouble installing a keycap, try using a keycap puller to remove it.
- Make sure that the keycaps are aligned properly before you press them into place.
- Be careful not to overtighten the keycaps.
The Typing Test
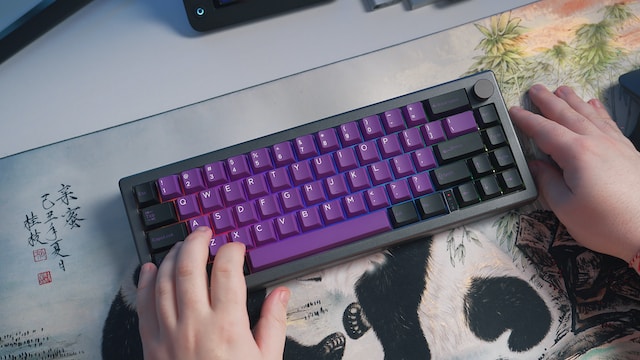
Now that your custom mechanical keyboard is complete, it’s time to put it to the test!
This is the moment you’ve been waiting for, so take your time and enjoy the experience.
How to test your keyboard:
- Plug your keyboard into your computer.
- Open a text editor or word processing program.
- Start typing!
- Pay attention to how the keyboard feels and sounds as you type.
- Test out all of the different keys, including the function keys and modifiers.
What to look for:
- Are the keys responsive and easy to press?
- Is the keyboard comfortable to type on?
- Are you happy with the sound of the keyboard?
If you’re not satisfied with something, don’t be afraid to make adjustments. You can try using different lubes, switches, or keycaps to find the perfect combination for you.
Congratulations on building your custom mechanical keyboard! Enjoy the satisfaction of having created a unique and personalized tool that’s tailored to your liking.
Conclusion:
Welcome to the world of custom gaming keyboards, where crafting your keyboard is an exciting journey filled with creativity and personal touch. From choosing parts to testing your final creation, we’ve got you covered.
As you begin your keyboard-building adventure, remember that every part you select reflects your unique style.
The feel of the keys, the satisfying click they make, and the look of your keycaps all express your personality.
But it’s more than just a cool keyboard. Building one is a chance to learn, experiment, and create something that’s truly yours.
It’s a mix of art and science, giving you a great typing experience and the pride of making something awesome.
I hope this blog has provided a lot of value and taught you how to build a custom gaming keyboard thoroughly.
So, dive into the world of custom gaming keyboards, let your creativity run wild, and build your perfect keyboard, one key at a time!
FAQs (Frequently Asked Questions)
Are custom gaming keyboards suitable for professional use?
Yes, custom gaming keyboards can also be great for professional tasks like typing and office work. Many offer customizable switches that cater to various preferences.
Can I build a wireless custom gaming keyboard?
Absolutely! You can build a wireless custom gaming keyboard by using compatible PCBs and wireless modules. It allows for a cable-free gaming experience.
Do I need soldering skills to build a custom gaming keyboard?
Some custom gaming keyboards require soldering to attach switches, but there are “hot-swappable” options available that don’t necessitate soldering, making them beginner-friendly.
Are custom keycaps compatible with all gaming keyboards?
Custom keycaps are not universally compatible due to variations in keyboard layouts and keycap profiles. Make sure to choose keycaps that match your gaming keyboard’s specifications.
What are artisan keycaps, and why are they popular in gaming keyboards?
Artisan keycaps are unique, handcrafted keycap designs that gamers often use to personalize their keyboards. They are popular for adding a distinct, visually appealing touch to gaming setups.
How do I choose the right switches for my custom gaming keyboard?
Choosing the right switches depends on your gaming preferences. If you prefer a tactile feel and audible click, go for mechanical switches. For a quieter experience, opt for linear switches. Research and try different switch types to find what suits you best.
Can I program macros and customize the lighting on a custom gaming keyboard?
Yes, many custom gaming keyboards come with software that allows you to program macros and customize RGB lighting effects. This enables you to create personalized key functions and enhance the visual appeal of your keyboard.
What’s the difference between a tenkeyless (TKL) and a full-sized gaming keyboard?
A tenkeyless (TKL) gaming keyboard lacks the numeric keypad found on a full-sized keyboard. TKL keyboards are more compact and can be more ergonomic for gaming setups with limited space. Full-sized keyboards are preferred by some gamers for their additional functionality for non-gaming tasks like data entry. Choose based on your specific needs and available space.
Also Read….
- How To Overclock a Gaming Keyboard Like a Pro [Step by Step]
- How To Game Better With A Keyboard And Mouse [Step by Step]
- How To Mod a Gaming Keyboard [Step-by-Step]
- How to Connect and Use Your Gaming Keyboard [Step by Step]
- Gaming Vs Normal Keyboards: Which is Right for You?
- How To Clean and Maintain a Gaming Keyboard Like a Pro
- How to Type Faster on a Gaming Keyboard [Step-by-Step]
- How To Choose a Gaming Keyboard [Ultimate Buying Guide 2024]
- How to Troubleshoot Your Gaming Keyboard Like a Pro
Hi, I’m Vishal, founder of Gaming Bar, your ultimate hub for gaming and tech gear. I am passionate and dedicated to improving your gaming experience and providing honest reviews about gaming and tech products. You’ll find plenty of honest, unbiased reviews, buying guides, and expert opinions presented in an engaging manner. All I ask is that you share my blog posts and support me.
